
Defining a landscape requires more than just planting a few shrubs along a perimeter. It involves the strategic orchestration of space to create a sense of transition, privacy, and purpose. For many homeowners, the challenge lies in partitioning large, open areas without incurring the high costs of masonry walls or custom ironwork. Effective garden divider ideas prioritize spatial hierarchy, allowing a backyard to function as a series of outdoor rooms rather than a single, exposed lot. By considering climate factors such as wind load and solar orientation, a transition element can also serve as a microclimate regulator; providing shade for delicate perennials or acting as a windbreak for seating areas. A well-placed divider enhances curb appeal by adding depth and layers to the visual field, transforming a flat lawn into a sophisticated architectural environment.
Professional landscape design relies on a structured approach to geometry and flow. When conceptualizing garden divider ideas, we look first at symmetry and focal points. A divider should never appear accidental; it must relate to the existing architecture of the home. This is often achieved through visual balance, where the weight of a Vertical Trellis on one side of a patio is balanced by a dense planting of Boxwood on the other. Elevation plays a critical role here. By introducing height through dividers, you guide the eye upward, making a small garden feel much larger. This is known as layering. You might start with low-profile Steel Edging at the ground level, move to mid-sized Ornamental Grasses, and finish with a high Cattle Panel screen draped in climbing vines.
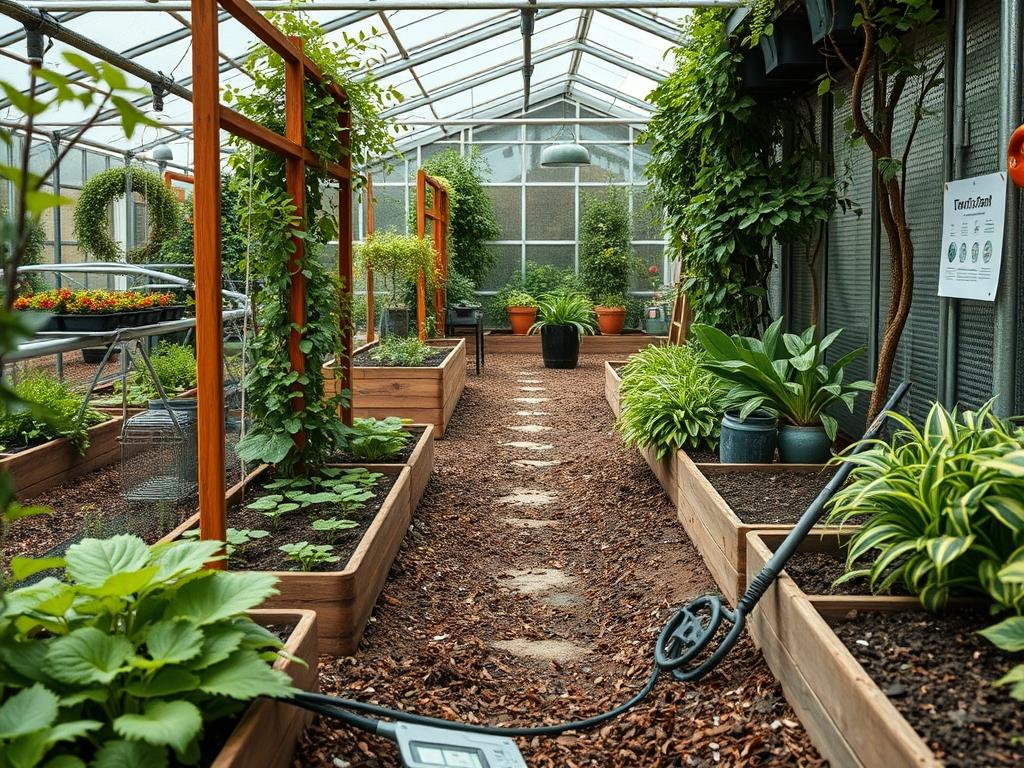
The integration of irrigation and circulation is equally vital. A divider should facilitate, not hinder, the movement of water and people. When planning walkways, ensure that dividers leave at least 36 inches of clearance for comfortable passage. If a divider consists of a living hedge, the irrigation system must be adjusted to account for the specific water demands of that species compared to the surrounding turf. We often utilize Drip Irrigation Lines hidden under a layer of mulch to ensure deep root hydration without wasting water through evaporation or runoff. By thinking of dividers as functional infrastructure, we ensure they contribute to the long-term health and usability of the site.
Plant and Material Selection
Selecting the right medium for your dividers depends on the site’s environmental constraints. Below is a curated selection of cost-effective plants and materials that serve as excellent spatial boundaries.
| Plant or Material Type | Sun Exposure | Soil Needs | Water Demand | Growth Speed | Maintenance Level |
| :— | :— | :— | :— | :— | :— |
| Privet (Ligustrum) | Full Sun to Part Shade | Well-drained, adaptable | Moderate | Fast | High (requires pruning) |
| Bamboo (Clumping) | Full Sun to Shade | Rich, moist soil | High | Very Fast | Moderate (needs containment) |
| Feather Reed Grass | Full Sun | Heavy clay or loam | Moderate | Moderate | Low (annual cutback) |
| Cattle Panels | N/A (Hardscape) | N/A | None | Immediate | Low (rust-resistant) |
| Western Red Cedar | N/A (Hardscape) | N/A | None | Immediate | Moderate (staining) |
| Miscanthus Sinensis | Full Sun | Average, moist | Low to Moderate | Fast | Low |
Implementation Strategy
The successful execution of garden divider ideas begins with a comprehensive site survey and grading plan. Before any materials arrive, you must identify the high and low points of the area to prevent water from pooling against your new structures. If you are installing a hard barrier like Corrugated Metal Panels or Pressure-Treated 4×4 Posts, ensure the footings are sunk at least 24 inches deep to resist frost heave or wind pressure. For living dividers, the preparation involves tilling the soil to a depth of 12 inches and incorporating organic compost to improve tilth and nutrient availability.
Once the layout is marked with Layout Strings and Marking Paint, start with the “skeleton” of the design. This consists of the primary hardscaping elements or the largest “anchor” plants. For a low-cost yet modern look, Cattle Panels can be arched between T-Posts to create a living tunnel or fixed vertically to act as a transparent screen. After the structure is set, define the base with Edging Tools to create a crisp line between the divider and the lawn. This prevents grass from encroaching into the divider bed. Apply a layer of Hardwood Mulch at a depth of 3 inches to regulate soil temperature and retain moisture. This step is non-negotiable for low-cost projects, as it drastically reduces the money spent on replacement plants due to drought stress or weed competition.
If the divider is intended to provide privacy, consider the “sightline” from the main viewing windows of the house. A divider that is only 48 inches tall may be sufficient for a seated patio area, but a boundary divider typically needs to reach 72 inches to provide a true sense of enclosure. Always check local municipal codes regarding fence and tall hedge heights, as many residential areas have a maximum height limit for front yard structures.
Common Landscaping Failures
The most frequent error in DIY garden divider implementation is the failure to account for drainage. When a solid divider like a Wood Fence or a stone Retaining Wall is installed across a slope, it acts as a dam. Without a French Drain or strategic gaps for water to pass through, you risks soil saturation, which can rot fence posts and drown plant roots. This is known as the “bathtub effect,” where water becomes trapped in a planting hole due to compacted surrounding soil. To avoid this, always test the percolation rate of your soil before planting.
Root overcrowding and improper spacing are secondary issues that plague many budget-conscious gardeners. It is tempting to plant Emerald Green Arborvitae close together to get an immediate screen; however, this leads to competition for light and nutrients. Eventually, the lower branches will die off, leaving you with a “leggy” hedge that offers no privacy at the base. Always follow the specific spacing recommendations for the species; for most hedging plants, this is roughly 24 to 36 inches on center. Finally, soil compaction from heavy foot traffic or construction equipment can kill the microbial life necessary for plant growth. Use Walking Stones or Aerate the soil to maintain the oxygen levels required for healthy root systems.
Seasonal Maintenance
A landscape is a living entity that requires a seasonal management schedule to maintain its architectural integrity. In the Spring, focus on rejuvenation. This is the time to apply a Slow-Release Fertilizer (such as a 10-10-10 blend) to living dividers and to prune any winter-damaged wood. It is also the ideal window to refresh the Organic Mulch to ensure a consistent depth of 3 inches. As the weather warms, check your Irrigation Controller and clean out any clogged emitters to prepare for the summer heat.
During the Summer, the priority shifts to moisture management and “deadheading” flowering vines or shrubs. For dividers made of Ornamental Grasses, ensuring they receive at least 1 inch of water per week will keep them upright and vibrant. Autumn is the season for structural assessment. Inspect Wooden Dividers for signs of rot or insect damage and apply a fresh coat of Sealer or Stain if necessary. This is also the best time to plant new deciduous trees or shrubs for dividers, as the cooler temperatures allow roots to establish without the stress of high heat. In the Winter, protect delicate living dividers from heavy snow loads by gently brushing off accumulation with a Leaf Rake. For hardscape dividers, check for any shifting caused by the freeze-thaw cycle and plan for adjustments in the coming spring.
Professional Landscaping FAQ
How can I create a divider on a very tight budget?
Utilize Upcycled Pallets or Cattle Panels combined with fast-growing annual vines. These materials provide immediate height and spatial definition for a fraction of the cost of traditional fencing; especially when combined with a thick layer of Wood Chips.
What is the best way to prevent weeds under a divider?
Install a heavy-duty Landscaping Fabric topped with 3 inches of mulch. For a more permanent solution, use Steel Edging to create a physical barrier that prevents rhizomatous grass from creeping into the divider bed from the lawn.
How do I choose between a living and a non-living divider?
Consider your time investment. A Cedar Screen provides instant privacy and requires only occasional staining; whereas a Privet Hedge takes years to grow and needs biannual pruning. Choose living dividers for environmental benefits and non-living for immediate results.
Can garden dividers help with drainage issues?
Yes, if designed correctly. You can integrate a Dry Creek Bed or a Bioswale as a natural divider. These features use River Rock and water-tolerant plants to manage runoff while simultaneously defining the boundaries of different garden zones.
How high should my garden divider be for privacy?
For total privacy while standing, aim for a height of 72 inches. If you only need privacy while seated on a patio, a height of 48 inches is often sufficient and creates a less claustrophobic feeling in smaller backyard spaces.