
Designing a safe and inviting landscape requires more than just careful plant selection or the arrangement of hardscape elements. It demands a rigorous focus on the transition zones where elevations change. Garden steps, while functional, present a significant liability if they are not illuminated with precision. In modern landscape architecture, garden step lighting serves a dual purpose by enhancing the aesthetic appeal of a property while mitigating the risk of falls and injuries. When we consider the impact of lighting on curb appeal, we are looking at how light interacts with textures, shadows, and the surrounding flora to create an atmosphere that feels both secure and sophisticated. A well lit staircase in a garden or backyard does not just point the way; it frames the journey through the outdoor environment, highlighting the intentionality of the design.
Climate considerations play a vital role in how we approach this task. In regions with heavy snowfall or frequent rain, lighting must be durable and strategically placed to remain visible and functional. In arid climates, the focus might shift to heat resistance and the cooling effect of soft, moonlit glows. Regardless of the environment, the ultimate goal of any outdoor lighting project is functionality combined with an elevated aesthetic. By integrating light fixtures directly into the anatomy of the garden, we ensure that the outdoor living space remains usable and beautiful long after the sun has set. Proper planning prevents the harsh, clinical glare of over-illumination, replacing it with a nuanced layer of light that respects the natural darkness of the night sky.
Landscape Design Principles
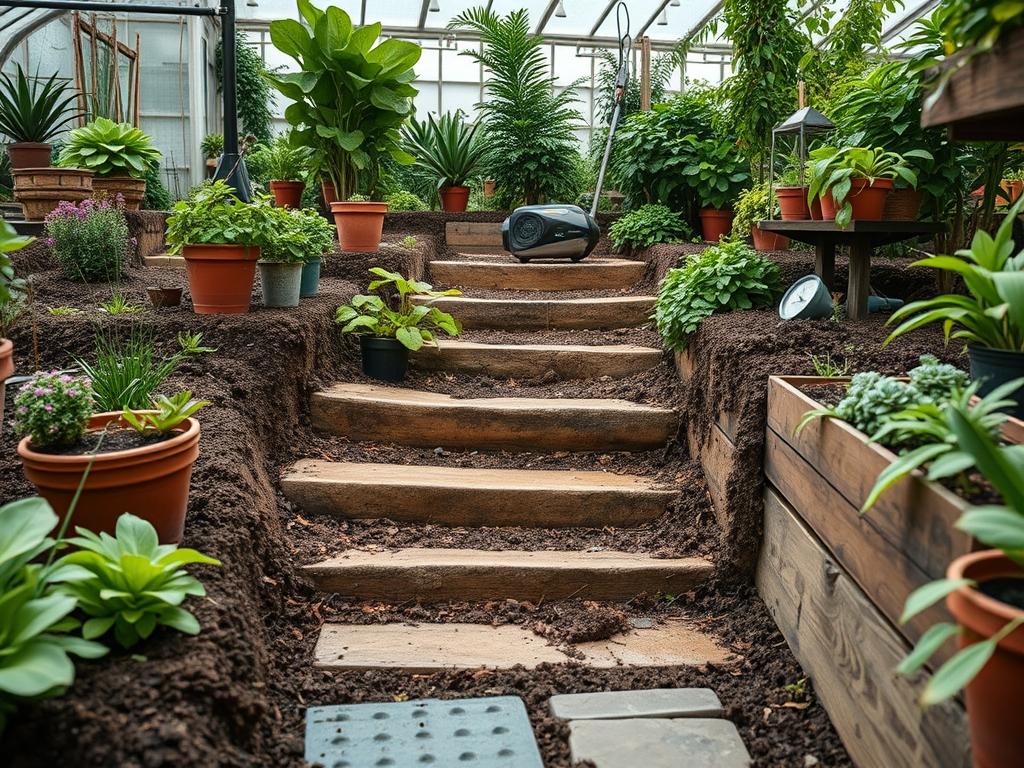
The foundation of effective lighting begins with the principles of landscape design, specifically symmetry and visual balance. When lighting garden steps, the goal is to create a rhythm that the eye can follow naturally. Symmetry does not always mean placing lights in a perfectly straight line on both sides of a staircase. Instead, it refers to the balance of light intensity. If one side of a path is heavily wooded, the light must be adjusted to account for the shadows cast by the foliage. Elevation layers are critical here. By lighting the vertical surfaces of steps, known as the risers, you provide a clear indication of depth and height change. This is often more effective than lighting the horizontal treads, which can lead to glare if the fixtures are not recessed properly.
Focal points are another essential consideration. A staircase often leads to a specific destination, such as a patio, a fire pit, or a water feature. Lighting should guide the visitor toward these focal points while ensuring the path itself is not lost in the shadows. Integrating lights into Retaining walls that flank the steps can create a beautiful wash of light across the stone or timber, highlighting the texture of the materials. Furthermore, irrigation planning must be coordinated with the lighting installation. Water and electricity are naturally at odds, so ensuring that Irrigation lines do not leak near underground conduits is a primary technical requirement. Walkways and steps should be treated as a single cohesive unit, where the transition from flat ground to an incline is marked by a subtle increase in light density to signal the change in terrain.
Plant and Material Selection
The following table outlines plants that complement garden steps and lighting by providing texture and structure without obstructing the light source or damaging the hardscape.
| Plant Type | Sun Exposure | Soil Needs | Water Demand | Growth Speed | Maintenance Level |
| :— | :— | :— | :— | :— | :— |
| Creeping Thyme | Full Sun | Well-drained | Low | Moderate | Low |
| Blue Star Creeper | Full/Part Sun | Moist | Medium | Fast | Moderate |
| Japanese Forest Grass | Part/Full Shade | Organic/Rich | Medium | Slow | Low |
| Dwarf Boxwood | Full/Part Sun | Loamy | Medium | Slow | Medium |
| Liriope (Lilyturf) | Sun/Shade | Adaptable | Low | Moderate | Low |
| Hosta (Miniature) | Full Shade | Moist/Rich | Medium | Moderate | Low |
| Sedum (Stonecrop) | Full Sun | Sandy/Gritty | Low | Moderate | Low |
When selecting materials for the steps themselves, consider the reflectivity of the surface. Darker stones like slate or dark granite will absorb more light, requiring slightly higher lumen outputs. Lighter materials like limestone or light-colored concrete reflect light effectively, allowing for lower wattage bulbs which save energy and reduce light pollution. Using Native plants along the perimeter of the steps is highly recommended, as these species are already adapted to local conditions and typically require less supplemental Irrigation.
Implementation Strategy
The implementation of garden step lighting begins long before the first fixture is purchased. It starts with proper Grading. The slope of the land must be stabilized to prevent the shifting of steps over time. Once the grade is established, the layout of the hardscape determines the lighting placement. For new constructions, it is best to install PVC conduits beneath the steps during the masonry phase. These conduits act as raceways for low voltage wiring, allowing for easy repairs or upgrades in the future. If you are retrofitting an existing staircase into a hillside, you may need to use Retaining walls to create a level surface for the lighting fixtures.
During the hardscaping phase, ensure that Drainage is a priority. Water should never pool on the steps or near the electrical connections. Use a layer of Gravel and Perforated pipe behind any walls to redirect hydrostatic pressure. When installing the fixtures, aim for a recessed look. Riser lights, which are installed directly into the vertical face of the step, should be placed about 2 inches below the lip of the tread to protect them from foot traffic and to minimize glare. Side-mount lights, or path lights, should be staggered on either side of the staircase to avoid a “runway” effect. Finally, after the lights are tested, apply a 2-inch to 3-inch layer of Mulch or decorative stone around the base of the lighting fixtures to keep weeds at bay and to help retain soil moisture for the surrounding plants.
Common Landscaping Failures
One of the most frequent mistakes in outdoor lighting is the failure to account for plant growth. Tiny saplings planted near step lights can grow into massive shrubs in just a few seasons, completely obscuring the light and creating a tripping hazard. This is why proper spacing and the selection of dwarf varieties are so important. Another common issue is improper Drainage. If the soil around the steps is not graded correctly, water will collect around the base of the fixtures, eventually causing corrosion or electrical shorts even in “weatherproof” equipment.
Soil compaction is another silent killer of both plants and lighting systems. Heavy machinery used during the installation of Retaining walls can compact the earth so tightly that roots cannot breathe and water cannot penetrate. This leads to runoff that can wash away the Mulch and expose buried wires. Furthermore, many homeowners ignore the technical requirements of low voltage systems. Using a transformer that is underpowered for the number of fixtures results in dim, yellowed light at the far end of the run. Conversely, over-illumination can ruin the ambiance of a garden and disturb neighbors or local wildlife. The key is to find a balance where safety is guaranteed without sacrificing the subtle beauty of the night landscape.
Seasonal Maintenance
Landscape management is a year round commitment. In the spring, check all light fixtures for damage caused by winter frost heave. As the ground thaws, soil can shift, potentially pulling on wires or tilting path lights. Pruning is essential during this time; ensure that ground covers like Blue Star Creeper or Creeping Thyme are not growing over the lenses of your recessed lights. During the summer, the focus shifts to hardware health. Heat can stress transformers, so ensure they are located in well ventilated areas. Check for any signs of pest damage, as rodents occasionally chew through low voltage wiring buried in the Mulch.
Autumn brings the challenge of fallen leaves. A buildup of organic debris on top of step lights can cause fixtures to overheat and can also trap moisture against the electrical components. Regularly clear the steps and the surrounding beds to maintain clear paths of light. In winter, avoid using harsh de-icing salts on or near your garden steps. These chemicals are corrosive to many metal light fixtures and can significantly damage the health of Native plants in the adjacent soil. Instead, use sand for traction. If you live in an area with heavy snow, use markers to indicate where path lights are located so they are not accidentally crushed by a snow shovel or blower.
Professional Landscaping FAQ
What is the best color temperature for garden step lighting?
For most residential landscapes, a warm white light between 2700K and 3000K is ideal. This range provides a welcoming, natural glow that enhances the colors of stone and foliage without the harsh profile of higher Kelvin blue-toned lights.
How many lumens are needed for each garden step?
Generally, 10 to 50 lumens per step is sufficient. The goal is to illuminate the tread clearly without creating glare. Lower lumens work best for recessed riser lights, while higher lumens are suitable for path lights positioned further away.
Do I need a professional to install low-voltage lighting?
While many homeowners can manage simple plug and play systems, professional installation is recommended for integrated masonry lighting. Professionals ensure proper Drainage, secondary circuit protection, and correct voltage drop calculations for long runs across complex Elevation layers.
Can I use solar lights for my garden steps?
Solar lights are convenient but often lack the reliability and brightness required for safety on stairs. Hardwired low voltage LED systems are much more dependable, especially in shaded areas or during the shorter days of winter when safety is most critical.
How deep should I bury my outdoor lighting wires?
For low voltage systems, wires should typically be buried at least 6 inches deep. This protects them from common gardening tools like aerators or shovels. In high traffic areas, running the wire through a protective conduit provides an extra layer of security.