
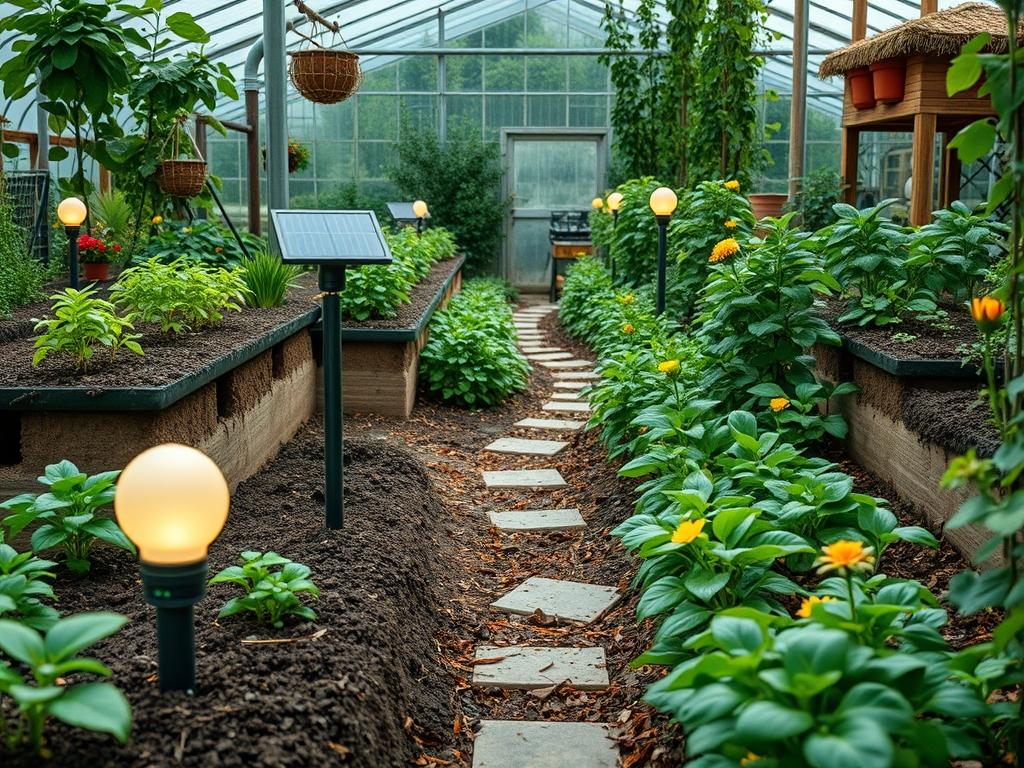
The transition of a landscape from day to night represents one of the most significant design opportunities for a property owner. While daylight reveals the textures of foliage and the vibrant colors of perennials, the evening allows for a controlled, theatrical interpretation of space where shadow and light dictate the narrative. Solar Garden Path Lighting has evolved from simple utility markers into sophisticated design elements that address the core challenges of modern landscaping, such as energy efficiency and ease of installation. In varied climates, these fixtures must endure intense ultraviolet exposure, high humidity, or freezing cycles, making the selection of high quality materials paramount. Proper illumination enhances curb appeal by highlighting architectural features and extending the functional hours of outdoor living spaces. It serves a dual purpose by ensuring safety along walkways while simultaneously defining the perimeter and depth of the garden.
The architectural integrity of a path depends on its relationship with the surrounding environment. Integrating solar lighting requires an understanding of how light interacts with vertical and horizontal planes. A successful design avoids the runway effect, where lights are placed in two straight, mirrored lines, creating a harsh and unimaginative corridor. Instead, the goal is to orchestrate a visual journey that guides the eye toward specific focal points, such as a Weeping Cherry or a custom Stone Basin. By considering the elevation of the terrain and the height of the fixtures, a landscape architect can create layers of light that Provide depth and prevent the garden from appearing flat after sunset.
Landscape Design Principles
Effective path lighting adheres to the principles of balance and rhythm. Symmetry is rarely the best approach for naturalistic gardens; instead, asymmetrical placement can create a more organic flow. If your walkway curves, place solar fixtures on the inside of the curves to emphasize the direction of the path. This technique leverages visual cues to guide movement without overwhelming the senses. Focal points should be treated with subtle backlighting or silhouetting. For instance, placing a low lumen solar spotlight behind a Boxwood hedge creates a dramatic halo effect that adds three dimensional depth to the landscape.
Elevation layers are critical in sloped terrains. When a path ascends, the lighting must be positioned to illuminate the tread of each step clearly to prevent tripping hazards. This often involves integrating lights into Retaining Walls or using hooded fixtures that direct light strictly downward. Irrigation planning must also be synchronized with light placement. While solar units do not require wiring, they are still susceptible to water intrusion from poorly aimed sprinkler heads. Ensuring that your layout accounts for the Irrigation Zone prevents mineral buildup on the solar collectors, which can drastically reduce their charging efficiency and lifespan.
Visual balance is achieved by contrasting light with shadow. In a professional landscape, the dark spaces are just as important as the illuminated ones. Use Solar Garden Path Lighting to create “pools” of light that overlap slightly, rather than a continuous beam. This creates a sense of mystery and sophistication. If a path transitions from a wide patio to a narrow woodland trail, the lighting should reflect that change in scale. Wider paths might require fixtures with a 360 degree throw, while narrow trails benefit from directional, low profile stakes that nestle into the Mulch or groundcover.
Plant and Material Selection
The success of a lighting design is inextricably linked to the botanical palette surrounding it. Plants with silver or light colored foliage, such as Lambs Ear or Dusty Miller, reflect light more effectively than dark green varieties. The following table provides a guide for selecting plants and materials that complement path lighting.
| Plant Type | Sun Exposure | Soil Needs | Water Demand | Growth Speed | Maintenance Level |
| :— | :— | :— | :— | :— | :— |
| Blue Fescue | Full Sun | Well Drained | Low | Moderate | Low |
| Creeping Thyme | Full Sun | Sandy/Loamy | Moderate | Fast | Low |
| Hosta | Shade/Part Sun | Rich/Moist | High | Moderate | Medium |
| Lavender | Full Sun | Alkaline | Low | Moderate | Moderate |
| Silver Mound | Full Sun | Poor to Average| Low | Moderate | Low |
| Japanese Forest Grass | Part Shade | Fertile/Moist | Moderate | Slow | Medium |
Implementation Strategy
Implementing a robust design begins with site grading. Before any fixtures are installed, the ground must be leveled to ensure that the solar panels receive optimal sunlight and that water does not pool at the base of the stakes. For a standard gravel or flagstone path, begin by defining the edges with Steel Edging or Paver Restraints. This provides a clean line and prevents the surrounding soil or Wood Chips from migrating onto the path. Once the hardscaping is set, plan your light placement by using temporary markers to visualize the spacing during different times of the day.
A common professional technique is to stagger the lights every 6 feet to 8 feet, depending on the lumen output of the specific Solar Garden Path Lighting units. Using a Rubber Mallet, gently seat the stakes into the ground, ensuring they are perfectly vertical. If the soil is compacted, use a Power Auger or a Hand Trowel to loosen the dirt first; never force a solar fixture into hard ground as it can damage the internal circuitry. After placement, apply a 3 inch layer of organic Bark Mulch around the base of the fixtures. This suppresses weeds that could grow tall enough to shade the solar collectors and helps regulate soil temperature around the stake.
For drainage, ensure that the path has a slight cross slope of roughly 2 percent. This directs rainwater away from the center of the walkway and into the planted borders. If you are installing lights near Retaining Walls, ensure that the Backfill consists of Clean Crushed Stone to allow for rapid drainage. This prevents hydrostatic pressure from shifting the wall and misaligning your integrated lighting. Finally, consider the future; even though solar lights are wireless, many architects install empty PVC Conduit beneath permanent paths during the construction phase to allow for future upgrades to low voltage wired systems if the landscape requirements change.
Common Landscaping Failures
One of the most frequent errors in garden design is the neglect of soil health and drainage, which indirectly affects lighting performance. Soil compaction prevents water from infiltrating the ground, leading to surface runoff that can displace Mulch and tip over light fixtures. Furthermore, root overcrowding occurs when fast growing shrubs are planted too close to walkways. Within two seasons, the foliage can completely envelope the solar sensors, rendering the lights useless. Always research the mature spread of a plant before selecting its location relative to your lighting.
Improper spacing is another hallmark of amateur design. Placing lights too close together creates “hot spots” that ruin the nocturnal ambiance and cause glare. Conversely, spacing them too far apart leaves dangerous dark gaps. Irrigation inefficiencies also play a role; if a system is not calibrated, the constant spray of hard water can leave calcium deposits on the Photovoltaic Cells, significantly lowering the battery charge. Professionals avoid these failures by conducting a thorough site analysis that includes sun path mapping and soil percolation tests before a single fixture is purchased.
Seasonal Maintenance
Maintaining a garden landscape requires a proactive, four season approach. In the spring, the primary focus is on cleaning the solar panels with a soft damp cloth to remove pollen and dust. Prune back any overhanging branches from Cornus Florida or other ornamental trees that might be casting new shadows on the solar collectors. As the summer heat intensifies, check the structural integrity of the stakes, as soil can shrink and loosen when dry. Ensure that the Irrigation System is functioning correctly and not over saturating the areas where the lights are seated.
Autumn brings the challenge of falling leaves, which can quickly cover ground level lights. Regular clearing is necessary to ensure the batteries continue to charge during the shorter days. This is also the time to apply a fresh layer of Compost or Triple Shredded Mulch to protect plant roots from the coming frost. In winter, if your region experiences heavy snow, it is often wise to remove the solar heads and store them indoors, or at the very least, clear snow off the panels after every storm. Cold temperatures can reduce battery capacity, so replacing the Rechargeable NiMH Batteries every two years is a standard practice to maintain consistent brightness.
Professional Landscaping FAQ
How many lumens do I need for a garden path?
For most residential walkways, a range of 10 lumens to 20 lumens per fixture is ideal. This provides enough light to see the ground clearly without creating excessive glare or light pollution that disturbs the natural evening environment.
How do I install solar lights in heavy clay soil?
Use a 1 inch drill bit or a Soil Probe to create a pilot hole before inserting the stake. Fill the base of the hole with a small amount of Coarse Sand to improve local drainage and prevent the stake from shifting.
Can solar path lights stay out during the winter?
Yes, most professional grade fixtures are rated for outdoor use year round. However, you must keep the Solar Collectors free of snow and ice. In extreme sub zero climates, battery life will diminish more rapidly than in temperate seasons.
What is the best way to prevent weed growth around lights?
Install a Landscape Fabric barrier beneath a 3 inch layer of Decorative Stone or Mulch. This creates a clean perimeter around the light stake, reducing the need for string trimmers which can accidentally damage the fixture stems.
Why do my solar lights turn off shortly after dark?
This is usually caused by a failing Rechargeable Battery or a dirty solar panel. First, clean the top of the unit with glass cleaner. If the performance does not improve, replace the internal battery with a high capacity NiMH cell.