
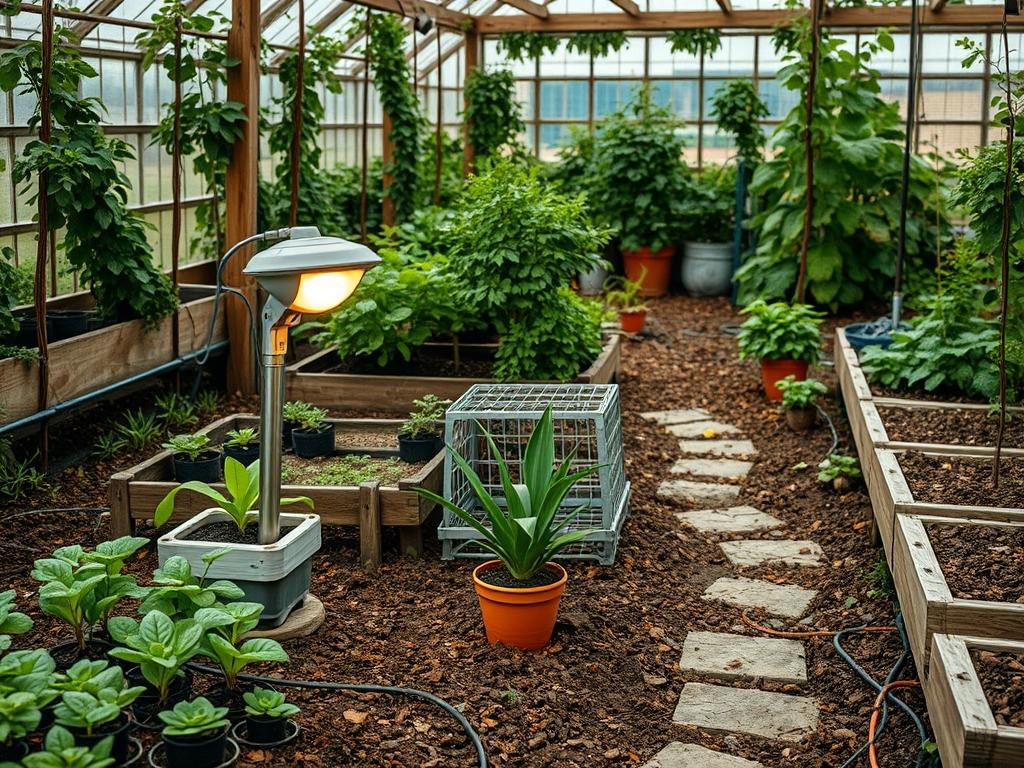
Creating a cohesive outdoor environment requires a delicate balance between aesthetic appeal and functional security. When homeowners approach the task of upgrading their property, they often view lighting and landscaping as two separate entities. However, a professional landscape architect understands that security is an inherent part of the design itself. Integrating Solar Security Lighting into a yard is not merely about mounting a fixture to a wall; it is about understanding how light interacts with the textures of Flagstone, the shadows of Evergreens, and the undulating topography of the land. The primary challenge lies in achieving high visibility without creating harsh, uninviting glares that diminish curb appeal. In regions with varying climate conditions, from heavy snowfall to intense heat, the hardware must be resilient, and the placement must be strategic to ensure the internal batteries receive maximum exposure to the sun.
The functionality of an outdoor space depends on its ability to serve the residents at all hours. During the day, the garden should offer a lush, restorative escape. At night, that same space must transform into a secure perimeter where motion sensors and illumination provide peace of mind. By focusing on site-specific factors such as the angle of the sun and the density of the existing canopy, a designer can create a plan where Solar Security Lighting enhances the architectural features of the home while simultaneously deterring unwanted visitors. This integration ensures that the security elements do not look like an afterthought but rather like a deliberate, sophisticated component of the overall landscape.
Landscape Design Principles
Successful landscape design rests on the principle of symmetry and the intentional creation of focal points. When planning the layout for a yard, the eye should be drawn toward specific anchors, such as a large Specimen Tree or a custom Retaining Wall. Symmetry does not always mean a perfect mirror image, but it does require a sense of visual equilibrium. For instance, if a high-output motion sensor light is placed on the left side of a garage, the right side should feature a complementary element, perhaps a decorative planter or a matching light fixture, to maintain balance.
Elevation layers are equally critical. A professional plan incorporates the foreground, midground, and background to create depth. Low-lying Groundcover should occupy the front of the beds, while Shrubs and Ornamental Grasses fill the middle layer, and Canopy Trees provide the backdrop. This layering is vital for security because it eliminates “blind spots” where intruders could hide. When installing Solar Security Lighting, fixtures should be placed at varying heights. Path lights at 18 inches high provide safe passage, while wall-mounted units at 8 feet high offer broad surveillance.
Walkways and circulation paths dictate how people move through the environment. These paths should be clearly defined with Stone Pavers or Crushed Granite. Irrigation planning must be synchronized with these hardscape elements to ensure that water does not pool near the base of lighting poles or compromise the structural integrity of the soil. A well-planned yard uses visual balance to lead the eye through the property, ensuring that every corner is accounted for and that the lighting reflects the intended use of each zone, whether it is a bright utility area or a softly lit dining patio.
Plant and Material Selection
The choice of vegetation directly impacts the effectiveness of your security system. Densely packed, overgrown foliage can block the internal sensors of your lights or cast long, confusing shadows. The following table provides a selection of plants that provide structure and beauty while remaining manageable for a security-conscious landscape.
| Plant Type | Sun Exposure | Soil Needs | Water Demand | Growth Speed | Maintenance Level |
| :— | :— | :— | :— | :— | :— |
| Boxwood | Full Sun to Part Shade | Well-drained, Loamy | Moderate | Slow | Low (requires pruning) |
| Lavender | Full Sun | Sandy, Alkaline | Low | Moderate | Low |
| Creeping Thyme | Full Sun | Poor to Average | Low | Fast | Very Low |
| Dwarf Fountain Grass | Full Sun | Any, Well-drained | Moderate | Fast | Low |
| Japanese Maple | Part Shade | Rich, Acidic | Moderate | Slow | Medium |
| Skyrocket Juniper | Full Sun | Well-drained | Low | Moderate | Low |
Using materials like Lava Rock or Hardwood Mulch around the base of these plants helps retain moisture and suppress weeds. For security infrastructure, high-quality Aluminum or Stainless Steel mounting brackets should be used to prevent rust and ensure the Solar Security Lighting remains firmly attached during high winds.
Implementation Strategy
The implementation phase begins with a thorough topographical assessment to address grading and drainage. Before any plants go into the ground, the land must be sloped away from the home at a minimum of a 1-inch drop for every 1-foot of distance. This prevents water from eroding the foundations of both the house and the lighting installations. Once the grade is established, the layout of the hardscaping, such as Gravel Paths and Brick Edging, should be marked using Surveyors Tape or Marking Paint.
When placing your Solar Security Lighting, prioritize areas of transition, such as gates, stairs, and dark corners. Most solar units require at least 6 hours of direct sunlight to function at peak capacity throughout the night. If your preferred light location is in a shaded area, look for models with a remote solar panel that can be mounted on a roofline or a sunnier patch of turf, connected by a discreetly buried Low-Voltage Wire.
After the hardware is positioned, begin the planting process. Dig holes that are twice as wide as the root ball but no deeper. Once the plants are in place, apply a 3-inch layer of Organic Mulch. This mulch acts as a protective barrier, regulating soil temperature and preventing the “splashing” of soil onto the lenses of your security lights during heavy rain. Finally, install Steel Edging to create a clean, professional border between the lawn and the planting beds, which prevents grass from encroaching on the light sensors.
Common Landscaping Failures
One of the most frequent errors in yard planning is the neglect of drainage, leading to soil saturation. When water pools around the base of a light fixture, it can cause the post to lean or the internal electronics to fail due to moisture ingress. Another common mistake is root overcrowding. Homeowners often plant Leyland Cypress or other fast-growing trees too close to the house or to each other. Over time, these roots can heave up Concrete Walkways and obscure the view of security cameras and lights.
Improper spacing is a failure of both aesthetics and safety. When plants are crowded, they become stressed and susceptible to disease, and they create a dense thicket that is impossible to light effectively. Soil compaction is another hidden enemy. During construction or heavy gardening, the soil can become pressed down, preventing air and water from reaching roots. This is often solved with a Core Aerator, which pulls small plugs of soil out to allow the ground to “breathe.” Lastly, irrigation inefficiencies, such as sprinkler heads that spray directly onto solar panels, can lead to mineral buildup and reduced charging efficiency.
Seasonal Maintenance
Landscape management is a year-round commitment that changes with the seasons. In the spring, focus on pruning and cleaning. Use Hand Pruners to remove any branches that have grown over your Solar Security Lighting sensors. This is also the time to apply a fresh layer of Mulch and check the irrigation system for leaks.
In the summer, the priority shifts to water management. Ensure that plants are getting enough hydration during heat waves, and occasionally wipe down the solar panels with a Microfiber Cloth to remove dust and pollen. Autumn requires the removal of fallen leaves, which can cover ground-mounted lights or harbor pests. It is also the best time to plant new Bulbs for the following year.
Winter poses unique challenges, especially regarding solar power. Shorter days mean less charging time, and snow accumulation can completely block the photovoltaic cells. Periodically clear snow from the tops of the lights using a Soft Brush. If you live in an area with extreme cold, check the battery health of your units, as frigid temperatures can reduce the capacity of lithium-ion cells.
Professional Landscaping FAQ
How high should I mount my security lights?
Mount fixtures at a height of 8 to 10 feet. This provides a wide beam spread and prevents the light from being easily tampered with or blocked by mid-sized garden shrubs and decorative fences.
What is the best way to clean solar panels?
Use a mixture of warm water and mild dish soap with a Soft Sponge. Avoid abrasive chemicals or Steel Wool, as scratches on the surface of the panel will significantly reduce its ability to collect sunlight.
Will solar lights work in the shade?
They will charge, but at a much slower rate. For shaded areas, use a light with a detached solar panel. Place the panel in a sunny spot up to 15 feet away using an extension cord.
How do I prevent my lights from being triggered by wind?
Adjust the sensitivity settings on your Solar Security Lighting. High-quality sensors allow you to narrow the field of vision or increase the weight threshold so that moving branches do not activate the light.
Do I need a professional to install these systems?
Most solar units are DIY-friendly because they require no hardwiring. However, for large-scale landscaping projects involving Grading and Retaining Walls, consulting a landscape architect ensures the lights are integrated safely and effectively.