
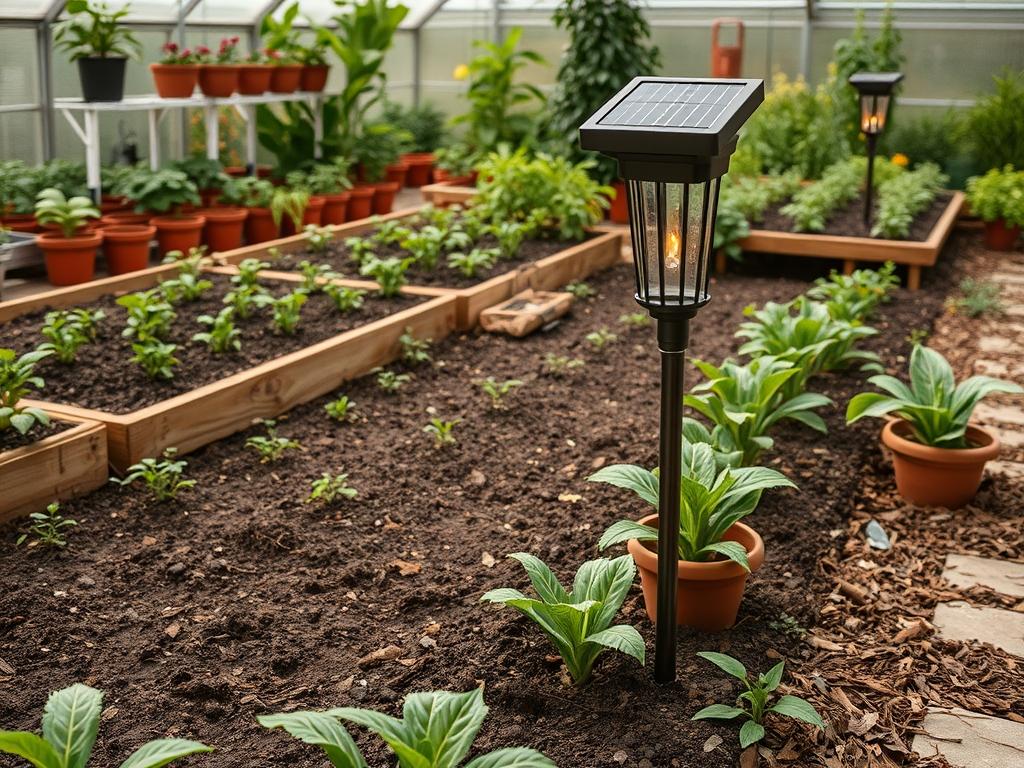
The integration of functional illumination into a residential landscape serves a dual purpose. It ensures safety during evening hours while simultaneously enhancing the architectural features of the property. For many homeowners, the challenge of outdoor lighting involves navigating the complex requirements of electrical trenching and high voltage wiring. Solar Garden Torch Lighting provides a sophisticated solution to this dilemma, offering a wireless method to introduce movement and warmth into a garden layout. Modern landscape design focuses heavily on the transition between day and night. During the day, the garden relies on foliage texture and floral color. At night, the environment relies on shadows and highlights to create depth. By strategically positioning solar torches, you can mimic the flickering glow of traditional flame based torches without the fire hazard or the infrastructure costs of hardwired systems.
This lighting approach is particularly effective in regions with temperate climates where outdoor living spaces are used year round. Curb appeal is significantly boosted when a property displays a layering of light that guides the eye from the street to the front door. Beyond aesthetics, the goal of a professional lighting plan is to address functionality. Illumination must define boundaries, highlight potential tripping hazards, and provide enough clearance for social interaction. When selecting a site for your torches, you must evaluate the solar exposure of the location. These fixtures require consistent, direct sunlight during the peak hours of the day to ensure the internal batteries can power the LED components throughout the night.
Landscape Design Principles
Effective landscape design relies on the core principles of balance, transition, and focal points. When utilizing Solar Garden Torch Lighting, the concept of symmetry can be employed to frame an entrance or a formal pathway. Placing torches at even intervals creates a rhythmic pattern that leads the viewer through the space. This is often seen in traditional or Mediterranean style gardens where order and structure are paramount. However, in more organic or rustic designs, asymmetrical placement can create a sense of mystery. By staggering the torches at different depths within a garden bed, you create a layered effect that suggests a larger, more expansive environment.
Elevation is another critical factor in a professional lighting scheme. Torches typically sit higher than standard path lights, often ranging from 36 to 60 inches in height. This elevation allows them to act as mid level markers in a three tier lighting strategy. The lowest tier consists of well lights or step lights. The middle tier features these torches, and the upper tier involves tree mounted spotlights or architectural downlighting. To maintain visual balance, ensure the torches do not overwhelm the surrounding plant life. Small shrubs or groundcovers provide a quiet base for the dramatic flickering effect of the torch. Furthermore, lighting should always consider irrigation. Ensure that torch stakes do not interfere with subsurface drip lines or the spray arcs of pop up rotors. A misplaced stake can easily puncture an irrigation lateral, leading to costly hydraulic failures.
Plant and Material Selection
Choosing the right vegetation to surround your lighting ensures that the light is caught and reflected in interesting ways. For example, ornamental grasses provide a fine texture that catches the light and moves with the wind, enhancing the flickering effect of the LED torch.
| Plant Type | Sun Exposure | Soil Needs | Water Demand | Growth Speed | Maintenance Level |
| :— | :— | :— | :— | :— | :— |
| English Lavender | Full Sun | Well Drained | Low | Moderate | Pruning after bloom |
| Boxwood Shrub | Full to Part Sun | Loamy/Moist | Moderate | Slow | Annual shaping |
| Blue Fescue | Full Sun | Sandy/Dry | Low | Fast | Division every 3 years |
| Hosta | Part to Full Shade | Rich/Humus | Moderate to High | Moderate | Leaf cleanup in fall |
| Feather Reed Grass | Full Sun | Heavy Clay/Moist | Moderate | Fast | Late winter cutback |
| Creeping Thyme | Full Sun | Gritty/Poor | Low | Moderate | Minimal |
When selecting hardscape materials to accompany your Solar Garden Torch Lighting, consider the reflective properties of the stone. Light colored pea gravel or flagstone will reflect the warm amber glow upward, brightening the ground plane. Darker materials like volcanic rock or black dyed mulch will swallow the light, focusing the viewers attention entirely on the torch head and the nearby foliage.
Implementation Strategy
The successful implementation of a garden lighting plan begins with proper site preparation. Start by assessing the grading of your beds. You want to ensure that the areas where you install your torches are not prone to standing water, as excessive moisture can degrade the stake over time. If your garden has a slope, use the torches to mark the top and bottom of the incline for safety. Once the grading is verified, define your garden edges using steel edging or poured concrete curbing. This provides a clean line between the turf and the planting beds, making it easier to position your torches without interfering with lawn mowers.
When installing the torches, use a rubber mallet to drive a pilot hole if the soil is compacted. Forcing the plastic or metal stake directly into hard ground can cause the housing to crack. For a professional finish, the torches should be installed at a consistent depth to ensure the heights are uniform. Once the lighting is in place, apply a layer of triple-milled cedar mulch at a depth of 3 inches around the base. This mulch layer suppresses weeds and helps retain soil moisture for the surrounding plants. If you are integrating these lights into a hardscape, such as a patio or a wooden deck, look for mounting brackets that allow the torch to be bolted directly to a post or railing. This ensures stability in high wind conditions and maintains a cohesive look with the existing structures.
Common Landscaping Failures
One of the most frequent mistakes in outdoor lighting and gardening is the failure to account for proper drainage. When water pools around lighting fixtures, even solar ones, it can seep into the battery compartments and cause corrosion. Always ensure your garden beds are slightly mown or sloped away from the house and the lighting units. Another common failure is root overcrowding. Many homeowners plant large shrubs too close to their torches. Within two seasons, the plant growth obscures the solar panel, preventing the light from charging. Professional spacing requires researching the mature width of your plants and positioning the torches at least two feet beyond that radius.
Soil compaction is another silent killer of landscape health. In areas with high foot traffic or heavy clay, the lack of pore space in the soil prevents oxygen from reaching plant roots and makes it difficult to install lighting stakes. Utilizing a core aerator or incorporating organic compost can alleviate this. Finally, irrigation inefficiency often ruins lighting plans. If a sprinkler head is aimed directly at a solar torch, the constant high pressure water can eventually breach the weather seals. Always check your spray patterns once the torches are installed to confirm they are not being bombarded by the irrigation system.
Seasonal Maintenance
Landscape management is a year round commitment that changes with the seasons. In the spring, the primary focus is on cleaning and inspection. Wipe down the solar panels with a soft, damp cloth to remove pollen and dust that accumulated over the winter. This ensures maximum charging efficiency. Prune back any spring growth that has begun to shade the light sensors. Summer maintenance involves managing heat stress. Ensure your plants receive adequate hydration through a drip irrigation system, specifically targeting the root zones. The high temperatures of summer can also cause some plastic stakes to become brittle, so handle them with care if you need to reposition them.
Autumn is the season for debris management. Falling leaves can cover solar panels and smother groundcover plants. Use a leaf blower or a standard rake to keep the beds clear. This is also the time to check the battery health. If a torch is not staying lit as long as it used to, you may need to replace the internal rechargeable Ni-MH batteries. As winter approaches, consider the specific needs of your climate. In areas with heavy snowfall, it is often wise to remove the torches and store them indoors to prevent damage from snow plows or extreme freezing. If the torches remain outside, ensure they are tall enough to clear the average snow depth so they can continue to receive sunlight.
Professional Landscaping FAQ
Can solar torches be used in shady areas of the garden?
Solar torches require direct sunlight to function effectively. If your garden is shaded, place the torches in sunny spots during the day and move them to the shade at night, or select models with remote solar panels that sit in the sun.
How far apart should I space my solar garden torches?
For a continuous path of light, space torches approximately 5 to 8 feet apart. For accent lighting or framing a focal point, spacing can be wider. Always test the glow radius at night before finalizing the installation of the stakes.
What is the best way to clean solar panels on lighting?
Use a mixture of mild soap and water with a non abrasive cloth. Avoid using harsh chemicals or scouring pads, as these can scratch the surface of the panel, permanently reducing its ability to absorb sunlight and charge the internal battery.
Do these lights need to be turned off during the winter?
Most solar torches are designed for year round use. However, in regions with very little winter sun, the battery may not fully charge. Turning them off can preserve battery life during periods when they do not receive enough light to operate.
Will mulch affect the performance of my torch lighting?
Mulch does not directly affect the light, but it should be kept away from the immediate base of the torch head. Ensure the soil beneath the mulch is firm so the stake remains vertical and does not lean as the mulch settles.