
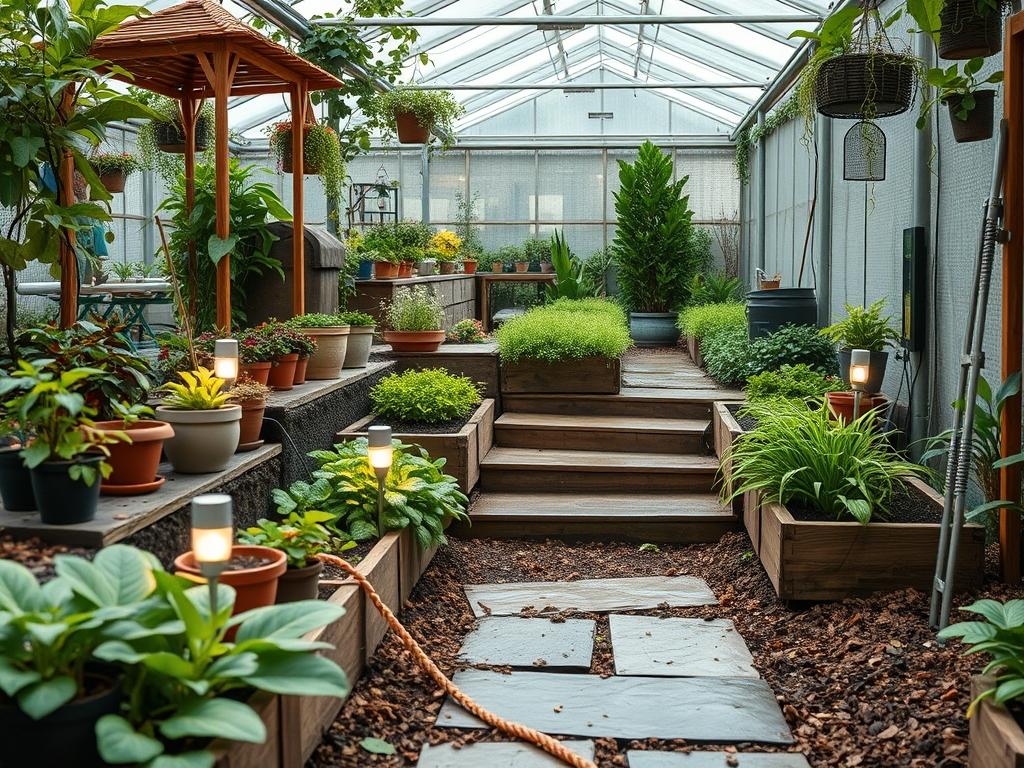
Designing an outdoor environment requires a delicate balance between structural integrity and aesthetic appeal. When a landscape transitions from the bright exposure of midday sun to the shadowed nuances of twilight, the functional requirements of the space shift dramatically. Safety becomes the primary objective, particularly in areas involving elevation changes such as multi level decks and transitionary staircases. Integrating Solar Deck Stair Lighting into a comprehensive landscape plan serves a dual purpose. It illuminates potential hazards while simultaneously defining the architectural permitter of the deck. This approach ensures that the transition between the built environment and the organic garden remains fluid and secure. Homeowners must consider how light interacts with shadows cast by nearby Specimen Trees or structural railings, as improper placement can create deceptive visual planes that increase the risk of trips and falls.
A successful landscape design views the deck not just as a platform, but as a central hub for outdoor living that dictates the flow of the entire backyard. Climate considerations play a significant role in this planning. In regions with high humidity or heavy precipitation, materials must be selected for their durability and resistance to rot. Furthermore, the efficiency of solar components depends heavily on the orientation of the property. North facing decks may struggle to reach the necessary UV exposure for consistent illumination, requiring the designer to choose high efficiency Monocrystalline Solar Panels or remote charging arrays. Beyond safety, the implementation of strategic lighting enhances curb appeal by highlighting the textures of high quality wood, stone, and foliage. By framing the stairs with light, the designer creates a directional path that guides the eye, establishing an inviting atmosphere that extends the usability of the garden into the evening hours.
Landscape Design Principles
In professional landscape architecture, the concept of symmetry is often employed to create a sense of order and tranquility. When installing Solar Deck Stair Lighting, placing fixtures at identical intervals on either side of the staircase provides a balanced visual weight. This symmetry helps the eye process the change in elevation quickly, which is critical for navigation. If the deck features an asymmetrical design, lighting can be used as a counterweight, using a higher density of light on the broader side to grounding the structure within the garden. Focal points should also be established. A well placed Up-light at the base of a nearby Japanese Maple can provide a soft background glow that reduces the harshness of the direct stair lights, creating a layered depth of field.
Elevation layers are another fundamental principle. A deck acts as a transition between the high point of the home and the lower grade of the turf. Each stair tread represents a mini elevation change that must be clearly demarcated. Designers often use the rule of thirds to determine the spacing of fixtures, ensuring that each 12 inch Tread is sufficiently washed in light without causing glare. Irrigation planning must also coincide with the electrical or solar layout. Even though solar lights do not require trenching for wires, the placement of Drip Emitters and Sprinkler Heads should be kept away from the fixtures to prevent mineral buildup on the sensors. Finally, visual balance is achieved by matching the color temperature of the deck lights with the surrounding landscape accents. Warm white tones, typically around 3000K, harmonize well with natural wood finishes and green foliage.
Plant and Material Selection
The following table outlines plants and materials that complement a well lit deck environment, considering their growth patterns and how they interact with surrounding hardscaping elements.
| Plant or Material | Sun Exposure | Soil Needs | Water Demand | Growth Speed | Maintenance Level |
| :— | :— | :— | :— | :— | :— |
| Boxwood Shrubs | Full Sun to Part Shade | Well drained, loamy | Medium | Slow | Moderate (Pruning) |
| Creeping Thyme | Full Sun | Sandy, dry | Low | Fast | Low (Groundcover) |
| Dwarf Fountain Grass | Full Sun | Adaptable | Low | Medium | Low (Seasonal cut) |
| Hostas | Full Shade to Part Sun | Rich, moist | Medium | Medium | Low |
| Stainless Steel Screws | N/A (Material) | N/A | N/A | N/A | Low (Corrosion resistant) |
| Lithium Iron Phosphate Battery | N/A (Material) | N/A | N/A | N/A | Moderate (5 year replacement) |
| River Rock | N/A (Material) | N/A | N/A | N/A | Low (Drainage) |
Implementation Strategy
The process begins with thorough site grading. Before the deck is even constructed, the ground beneath the intended staircase should be sloped at a 2 percent Grade away from the foundation to prevent water pooling. Once the deck structure is in place, focus shifts to the installation of the Solar Deck Stair Lighting. Owners should begin by measuring the center point of each riser. For optimal coverage, fixtures should be mounted approximately 2 inches below the lip of the tread. This positioning protects the housing from foot traffic while casting a wide beam across the walking surface. Using a Power Drill with a 1/8 inch Drill Bit, create pilot holes into the wood or composite material to prevent splitting.
Once the mounting brackets are secured with Weather Resistant Fasteners, the solar units can be snapped into place. It is vital to ensure that the Photovoltaic Cell on top of the fixture is not obstructed by overhanging railings or nearby foliage. For the perimeter of the stairs, edging should be installed to create a clean break between the hardscape and the garden beds. A Steel Edging or Plastic Terrace Board prevents Hardwood Mulch from washing onto the stairs during heavy rains. The mulch should be applied at a 3 inch Depth to suppress weeds and retain moisture for the foundation plants. Proper drainage should be reinforced by a layer of Landscape Fabric topped with Pea Gravel or River Rock around the base of the stairs. This prevents soil splashback from staining the deck and keeps the solar sensors clean.
Common Landscaping Failures
One of the most frequent errors in garden planning is neglecting drainage near structural footings. When water accumulates at the base of deck stairs, it can cause the wood to swell, leading to the misalignment of Solar Deck Stair Lighting fixtures. Furthermore, excessive moisture promotes the growth of algae on the deck surface, creating a slip hazard that lighting alone cannot mitigate. Another significant issue is root overcrowding. Planting large species like Silver Maples too close to a deck will eventually lead to root heave, which can lift the staircase and break the seal on lighting components.
Improper spacing is also a common pitfall. Fixtures placed too far apart create “dead zones” of total darkness, which are more dangerous than no light at all because they confuse the depth perception of the user. Soil compaction is another silent failure. During the construction of the deck, heavy foot traffic and equipment can compress the earth, destroying the soil structure and leading to poor plant health and drainage issues. Finally, irrigation inefficiency often ruins solar setups. If Rotary Nozzles are directed at the deck stairs, the constant cycle of wetting and drying will degrade the Polycarbonate Lenses of the solar lights, causing them to become cloudy and ineffective over time.
Seasonal Maintenance
Landscape management requires a rolling schedule to ensure the longevity of both the flora and the functional hardware. In the Spring, the focus should be on cleaning and inspection. Wipe the Solar Panels with a damp, lint free cloth to remove the buildup of pollen and winter grime. Check the Battery Compartments for any sign of corrosion and replace the Rechargeable NiMH Batteries if they no longer hold a charge throughout the night. This is also the time to apply a fresh layer of Bark Mulch and prune any Evergreen Shrubs that may have grown to overshadow the sensors.
During the Summer, the priority shifts to irrigation management. Ensure that the increased watering schedule is not causing overspray onto the deck. Monitor the health of the plants in the high heat, as stressed plants are more susceptible to pests that might nest near the warmth of the lighting fixtures. Autumn requires the removal of fallen leaves and debris. If leaves are allowed to sit on the Solar Deck Stair Lighting, they will block the charge and can cause permanent staining on the deck boards. In the Winter, use a soft brush to clear snow from the panels after every storm. Avoid using De-icing Salts near the stairs, as the chemical runoff can corrode the metal components of the lights and damage the root systems of the surrounding vegetation.
Professional Landscaping FAQ
What is the best height for stair lighting?
Fixtures should be mounted on the riser, approximately 2 inches below the tread overhang. This ensures the light is directed downward onto the step, providing clear visibility while protecting the lens from being stepped on or damaged by weather.
How many hours of sun do solar lights need?
Direct sunlight for 6 to 8 hours is typically required to achieve a full charge. High quality Monocrystalline Panels can function in partial shade, but they may provide fewer hours of illumination during the winter months when days are shorter.
Can I install these on composite decking?
Yes, but you must use specific Self Tapping Screws designed for composite materials to avoid “mushrooming” around the hole. Always pre drill pilot holes to ensure the integrity of the board and to provide a flush fit for the fixture.
Will mulch affect my solar lighting?
If Organic Mulch is piled too high, it can cover low mounted fixtures or hold moisture against the electrical housing. Maintain a 2 inch Gap between the mulch surface and the bottom of the lighting unit to ensure proper airflow and drainage.
Do these lights work in freezing temperatures?
Most professional grade Solar Deck Stair Lighting is rated for sub zero temperatures. However, extreme cold can temporarily reduce the capacity of the Lithium Ion Batteries. Ensure the panels are kept clear of snow to maximize daily charging potential.