
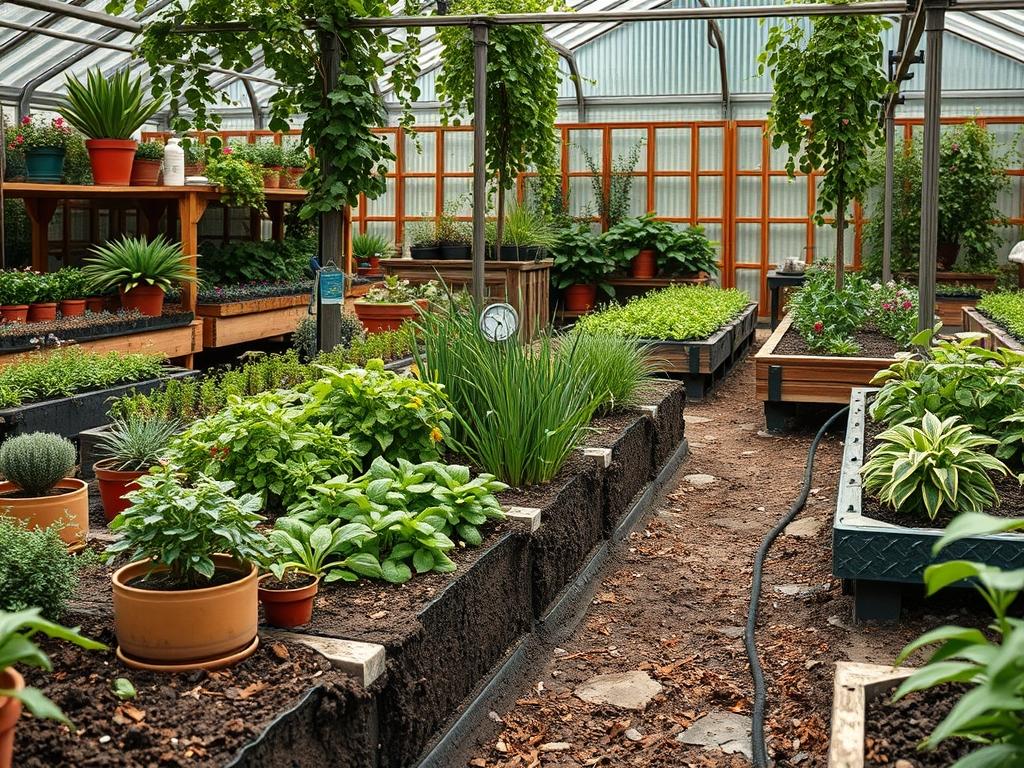
Selecting the right materials for an outdoor environment requires a delicate balance between aesthetic vision and geological reality. When homeowners begin the process of choosing natural stone for a walkway, they are often seduced by color and texture without fully considering the long term physical demands placed upon the surface. A walkway is more than a simple path from the driveway to the front door; it is a structural element that must withstand freeze-thaw cycles, heavy foot traffic, and the relentless migration of soil. Choosing natural stone involves evaluating porosity, slip resistance, and compressive strength to ensure the investment lasts for decades. The choice of material dictates the personality of the landscape, whether it leans toward the rugged randomness of Flagstone or the sophisticated, clean lines of Dimensional Bluestone.
Landscape Design Principles
Integrating a natural stone walkway into a cohesive landscape requires a deep understanding of visual weight and movement. Symmetry often dictates the formal tone of a garden, where a central path creates a mirrored effect that draws the eye toward a specific focal point, such as a Water Feature or a bespoke Retaining Wall. However, in more contemporary or rustic designs, asymmetrical balance provides a more organic feel. This is achieved by varying the density of plantings on either side of the stone path to prevent the eye from following a single, predictable line.
Elevation layers play a vital role in how stone is perceived. If the property has significant slopes, the walkway must incorporate Stone Steps or tiered sections to manage the transition safely. Landscape architects often use these elevation changes to create “rooms” within the garden, using the stone path as the connective tissue. Irrigation planning must happen concurrently with stone selection. Hardscaping acts as a barrier to water infiltration, so the placement of PVC Piping and Drainage Grates must be hidden beneath the stone or integrated into the edging.
The scale of the stone must also match the scale of the surrounding architecture. A small cottage may be overwhelmed by massive Granite Boulders, while a sprawling estate might make small Pea Gravel paths look insignificant. Visual balance is maintained when the width of the walkway feels proportional to the height of the nearby shrubs and the massing of the house facade. A standard primary walkway should be at least 4 to 5 feet wide to allow two people to walk side by side comfortably, while secondary garden paths can narrow to 2 or 3 feet.
Plant and Material Selection
| Plant or Material Type | Sun Exposure | Soil Needs | Water Demand | Growth Speed | Maintenance Level |
| :— | :— | :— | :— | :— | :— |
| Bluestone (Material) | Full Sun/Shade | N/A | Low | N/A | Moderate |
| Travertine (Material) | Full Sun | N/A | Low | N/A | Low |
| Creeping Thyme (Plant) | Full Sun | Well-Drained | Low | Moderate | Low |
| Blue Fescue (Plant) | Full Sun | Sandy/Dry | Low | Moderate | Low |
| Flagstone (Material) | Full Sun/Shade | N/A | Low | N/A | Moderate |
| Boxwood Shrubs (Plant) | Partial Shade | Loamy | Moderate | Slow | High |
| Slate (Material) | Partial Shade | N/A | Low | N/A | High |
Implementation Strategy
The successful installation of a natural stone walkway begins long before the first stone is laid. Proper site preparation is the most critical phase of the project. We start with grading the land to ensure a slight slope, typically a 1/4 inch per foot drop, away from the foundation of the home. This prevents water from pooling against the structure and causing hydrostatic pressure issues. Once the path is marked using Landscaping Stakes and Layout String, we excavate the area to a depth of roughly 6 to 8 inches depending on the thickness of the stone and the climate.
After excavation, we install a layer of Geotextile Fabric to separate the soil from the base material. This prevents the stone from sinking into the mud over time. A base of Crushed Stone or ¾-inch minus gravel is then spread in 2-inch lifts, with each layer being compacted using a Power Plate Compactor. This creates a rigid, non-shifting foundation. A thin layer of Bedding Sand or Stone Dust is spread over the compacted gravel to provide a workable surface for leveling each individual piece of stone.
When placing the stone, the installer must use a Rubber Mallet to set the pieces into the bedding. If you are using irregular Flagstone, the process is like solving a puzzle; you must maintain consistent joint widths of roughly 1/2 inch to 1 inch. For a more stable finish, Polymeric Sand is swept into the joints. This specialized sand contains binders that harden when misted with water, effectively locking the stones in place and preventing weed growth and ant infestations. Finally, stone Edging or Metal Benders should be installed along the perimeter to hold the entire assembly together and prevent lateral shifting.
Common Landscaping Failures
The most frequent mistake in natural stone installation is the neglect of subsurface drainage. When water is trapped beneath stones, the freeze-thaw cycle will cause the path to heave and crack, creating tripping hazards and unsightly gaps. Improper soil compaction is another leading cause of failure. If the base is not packed tightly with a Compactor, the stones will settle unevenly within the first year, requiring a complete lift and relaying of the material.
Root overcrowding and improper spacing of nearby plants also threaten the lifespan of a walkway. Planting a high-growth tree like a Willow or certain Maple species too close to a stone path will lead to powerful roots lifting the heavy stones over time. Designers must research the mature root spread of any nearby vegetation. Furthermore, choosing the wrong type of stone for the specific climate can lead to rapid degradation. For example, using a highly porous Limestone in an area with heavy winter salt application will cause the stone to spall and flake, eventually turning back into dust.
Seasonal Maintenance
Landscape management is a year round commitment that changes with the weather. In the spring, the focus should be on cleaning and inspection. Use a Stiff Broom and a mild detergent to remove moss and algae that may have accumulated during the damp winter months. This is also the time to check the integrity of the Polymeric Sand joints and top them off if they have eroded.
During the summer, maintenance shifts to vegetation control. While the stone itself requires little care in the heat, the surrounding Mulch should be checked to ensure it is not spilling onto the path. If you have used organic material between stones, such as Dwarf Mondo Grass, ensure the Irrigation System is delivering deep, infrequent watering to encourage deep root growth rather than shallow surface roots.
Autumn requires the diligent removal of fallen leaves. Organic matter left to rot on natural stone can cause permanent tannins to stain the surface, particularly on lighter materials like Travertine or Light Gray Granite. Using a Leaf Blower regularly prevents this buildup. Finally, in winter, avoid using harsh de-icing chemicals or rock salt on natural stone. These chemicals can penetrate the pores and cause internal pressure that shatters the stone. Instead, use Sand or Chicken Grit for traction, which provides safety without compromising the chemical integrity of the material.
Professional Landscaping FAQ
How do I choose the right stone color for my climate?
Darker stones like Basalt or Dark Slate absorb significant heat, making them uncomfortable for bare feet in southern climates. In warmer regions, choose lighter Travertine or Sandstone to reflect sunlight and keep the walkway surface cool during the summer.
Is it better to set stone in mortar or sand?
Sand-set walkways are flexible and easier to repair if the ground shifts. Mortar provides a rigid, formal look but is prone to cracking in regions with extreme temperature fluctuations. For most residential walkways, a sand-set base is the superior long-term choice.
What is the best way to prevent weeds between stones?
Using high-quality Polymeric Sand in the joints creates a hardened barrier that prevents seeds from reaching the soil. Additionally, installing a heavy-duty Geotextile Fabric beneath the base layer inhibits weeds from pushing up from the ground below the walkway.
Can I install natural stone directly on top of dirt?
Never install stone directly on soil. Without a compacted Gravel Base, the stones will shift, sink, and tilt within weeks. Proper excavation and a structured base are essential to distribute the weight of foot traffic and allow for drainage.
Which natural stones are the most slip-resistant?
Stones with a natural cleft or Honed finish, such as Flagstone, Bluestone, or Tumbled Travertine, provide the best traction. Avoid highly polished stones like Polished Granite or Marble for outdoor walkways, as they become dangerously slick when they are wet.