
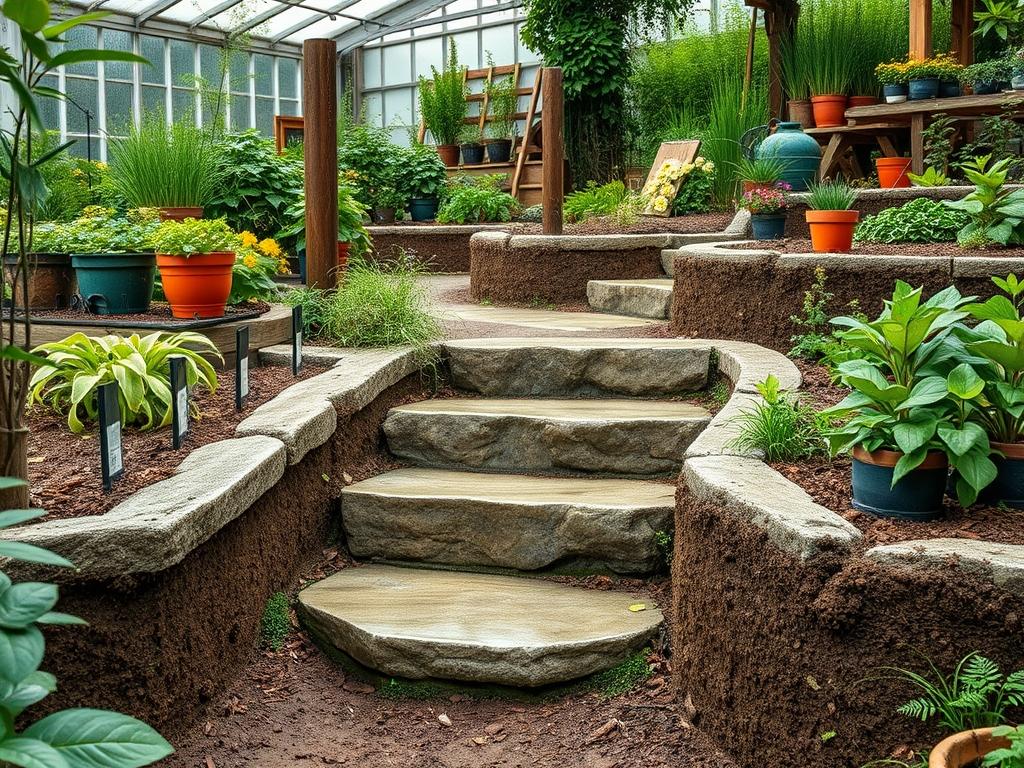
Integrating natural stone steps into a landscape requires a sophisticated understanding of both geological properties and structural engineering. These functional elements are far more than mere transitions between elevations. They serve as the structural backbone of a sloped garden, providing a sense of permanence and an immediate boost to curb appeal. When a designer approaches a steep grade, the primary challenge is to harmonize the rigid nature of the stone with the organic fluidity of the surrounding flora. High quality stone installations must account for the local climate, particularly in regions prone to heavy rainfall or freeze-thaw cycles. Without a deep understanding of soil mechanics and drainage, even the most beautiful Granite or Fieldstone slabs will eventually shift, tilt, or sink into the earth.
Professional garden planning begins with the recognition that every landscape has a unique topographical rhythm. Natural stone steps act as a visual guide, drawing the eye toward specific focal points while solving the practical problem of accessibility. In a humid or temperate environment, the choice of material is critical. Dense, non-porous stones like Bluestone or Granite are often preferred for their resistance to moisture absorption, which prevents cracking during winter months. Conversely, in drier climates, softer Sandstone or Limestone might offer the desired aesthetic while remaining stable underfoot. The goal of any serious landscaping project is to create a transition that looks as though it has existed for centuries, blending the raw power of the earth with the refined needs of a modern outdoor living space.
Landscape Design Principles
Successful stone step design relies heavily on the concepts of symmetry and visual balance. While a staircase might be physically centered in a yard, true aesthetic balance often involves asymmetrical plantings or the clever use of Retaining Walls to frame the ascent. Architects often apply the “Golden Ratio” to the rise and run of garden steps. For a comfortable outdoor climb, a rise of 6 inches paired with a deep tread of 14 inches to 16 inches is standard. This encourages a slower, more mindful pace, allowing the visitor to appreciate the surrounding garden.
Elevation layers play a vital role in how the human eye perceives space. By breaking a long, steep incline into several shorter flights of steps separated by wide landings, a designer creates “breathing room” in the landscape. These landings can serve as secondary focal points, perhaps hosting a stone bench or a sculptural water feature. Irrigation planning must be integrated into this design phase. Water should never be allowed to pool on the stone surfaces or behind the riser. Instead, the design should incorporate subtle cross-slopes of approximately 1/8 inch per foot to direct runoff into designated drainage channels or rain gardens. This prevents the stone from becoming slick with algae and protects the integrity of the soil beneath the installation.
The relationship between the steps and adjacent walkways is equally important. A transition from a gravel path to a heavy Flagstone step should be seamless, utilizing professional edging to prevent material migration. By layering different textures, from the smoothness of sawn stone to the ruggedness of natural cleft faces, a landscape architect creates a sensory experience that changes with the angle of the sun. Visual balance is further achieved by flanking the steps with tiered plantings that soften the hard edges of the masonry, ensuring the structure feels anchored rather than imposed.
Plant and Material Selection
The following table outlines high-performing plant species that complement the structural integrity and aesthetic of natural stone steps. These selections focus on ground covers and accent plants that thrive in the microclimates created by stone mass.
| Plant Type | Sun Exposure | Soil Needs | Water Demand | Growth Speed | Maintenance Level |
| :— | :— | :— | :— | :— | :— |
| Creeping Thyme | Full Sun | Well-drained | Low | Moderate | Low |
| Blue Star Creeper | Full/Part Sun | Moist/Rich | Medium | Fast | Moderate |
| Dwarf Mondo Grass | Part/Full Shade | Standard | Medium | Slow | Very Low |
| Sedum Stonecrop | Full Sun | Sandy/Poor | Very Low | Moderate | Low |
| Japanese Forest Grass | Shade/Part Sun | Rich/Humus | Medium | Slow | Low |
| Green Carpet Pachysandra | Full/Part Shade | Acidic | Medium | Moderate | Low |
When selecting stone materials, consider the local geology to ensure a cohesive look. Bluestone is highly durable and offers a sophisticated blue-gray palette. Flagstone provides a more rustic, irregular appearance that is ideal for cottage gardens. For those seeking absolute longevity, Granite blocks offer unmatched density and weather resistance. Regardless of the stone type, always specify a thickness of at least 2 inches for treads to ensure they do not crack under pressure or shift during ground movement.
Implementation Strategy
The construction of natural stone steps begins with a rigorous grading plan. Use a Transit Level or a Laser Level to determine the total rise from the bottom to the top of the slope. Once the measurements are clear, divide the total rise by the desired riser height to determine the number of steps required. Excavation is the next critical phase. It is essential to dig deep enough to accommodate a substantial base of 3/4-inch minus crushed limestone or Compacted Gravel. A base depth of 6 inches to 8 inches is recommended for stability.
After the trench is excavated, lay down a heavy duty Geotextile Fabric to separate the stone base from the native soil. This prevents the gravel from migrating into the clay or silt over time. Use a Plate Compactor to solidify the base material in 2-inch lifts. Starting at the bottom of the slope, set the first riser. This stone should be buried slightly below the finished grade of the lower path to lock it in place. Each subsequent stone should overlap the one beneath it by at least 2 inches to create a stable, interlocking structure.
As you work your way up the incline, use a Spirit Level to ensure each tread has a slight forward pitch for drainage. Once the stones are set, backfill the gaps with Polymeric Sand or small decorative pebbles to prevent weed growth and provide further stability. To finish the surrounding area, apply a 3-inch layer of organic Mulch to the garden beds flanking the steps. This helps retain moisture for the new plantings and provides a clean, professional finish to the hardscaping.
Common Landscaping Failures
The most frequent failure in stone step installation involves poor drainage management. When water is trapped behind a stone riser, the resulting hydrostatic pressure can push the stones out of alignment. Furthermore, in cold climates, trapped water freezes and expands, leading to the dreaded “heave” that ruins the levelness of the staircase. This is why a drainage pipe or a layer of clean, free-draining stone behind the risers is a non-negotiable requirement for professional builds.
Root overcrowding is another common oversight. While it is tempting to plant vigorous shrubs right against the stone, the growing root systems of large plants can eventually exert enough force to crack or displace heavy stones. Always research the mature spread of a plant before placing it near your masonry. Similarly, improper spacing between stones can lead to “trip hazards.” If the gap between two natural stones is too wide, or if the height of the risers varies by more than 1/4 inch, the staircase becomes dangerous for users. Soil compaction issues often arise when builders skip the use of a mechanical compactor, leading to uneven settling within the first year of installation.
Seasonal Maintenance
A durable garden requires a proactive maintenance schedule to preserve the beauty of the natural stone and the health of the surrounding flora.
- Spring: Inspect the steps for any shifting that occurred during the winter thaw. Re-level stones if necessary. Clean away debris and fallen leaves that may have accumulated in the joints during winter, as these can hold moisture and promote moss growth.
- Summer: Monitor the irrigation system to ensure that spray heads are not pointing directly at the stone surfaces, which can cause mineral staining. Prune any overhanging branches or encroaching ground covers like Creeping Thyme to keep the step treads clear and safe.
- Autumn: Clear fallen leaves regularly. If left to rot on porous stones like Limestone, the tannins in the leaves can create deep, stubborn stains. This is also the time to refresh the Mulch layers to protect plant roots from the coming cold.
- Winter: Avoid using rock salt or chemical de-icers on natural stone, as these can cause significant surface spalling and degradation. Instead, use clean sand for traction. Ensure that drainage paths are clear of snow to allow for proper runoff during mid-winter melts.
Professional Landscaping FAQ
What is the best type of stone for garden steps?
Granite and Bluestone are the top choices due to their density and weather resistance. They withstand heavy foot traffic and environmental stress better than softer sedimentary rocks, ensuring the staircase remains functional and attractive for decades.
How do you prevent stone steps from sinking?
The key is a deep, well-compacted base of Crushed Limestone over a layer of Geotextile Fabric. This foundation distributes the weight of the stone across a larger surface area and prevents the material from settling into the subsoil.
Is it necessary to use mortar for natural stone steps?
Dry stacking is often preferred for garden environments because it allows for natural movement and drainage. Mortared steps are more prone to cracking during freeze-thaw cycles unless they are built on a reinforced concrete frost footing.
How do I choose plants to go between stone steps?
Select low-profile ground covers like Blue Star Creeper or Stonecrop. These species are resilient enough to handle occasional foot traffic and the radiant heat that stone surfaces release during the summer months, while also suppressing weed growth.
How much slope is needed for proper drainage on a step?
A forward pitch of 1/8 inch per foot is ideal. This subtle angle is imperceptible to someone walking on the steps, yet it is sufficient to ensure that rainwater flows off the surface and does not pool.