
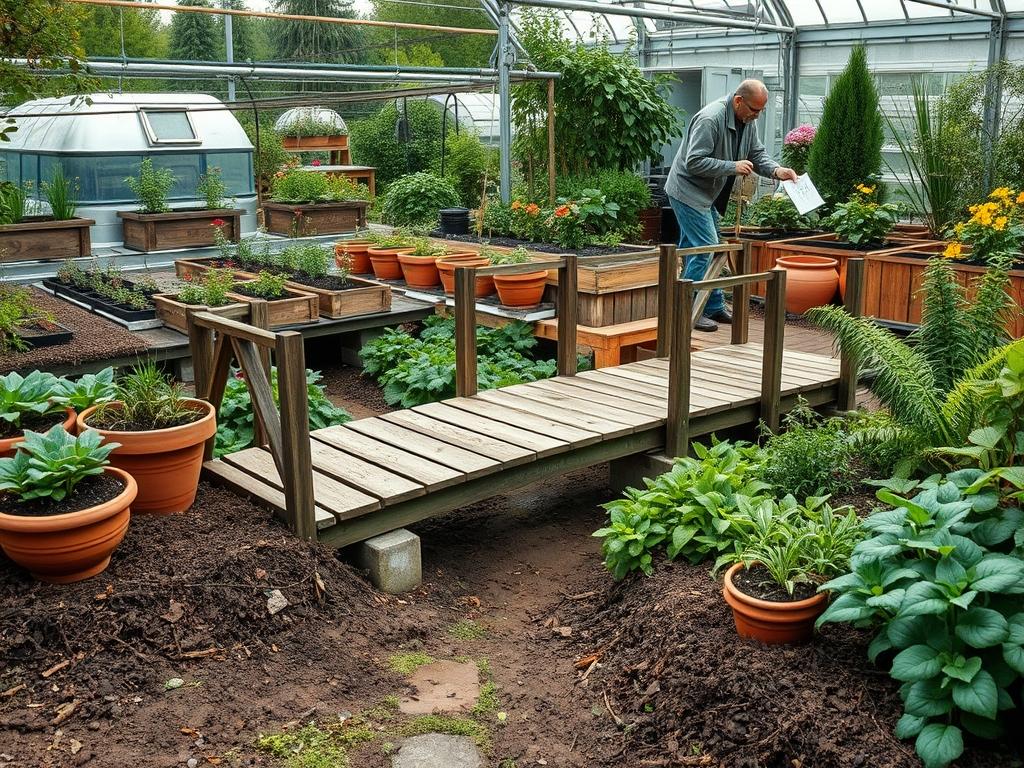
Managing the movement of water across a property is one of the most significant challenges a landscape architect faces. Homeowners often view drainage issues as a burden, yet these topographical necessities provide a unique opportunity to introduce architectural depth and character. Integrating backyard bridge designs into a landscape featuring a dry creek bed elevates a functional utility into a sophisticated focal point. Instead of hiding a drainage swale behind rows of shrubs, we can embrace the natural grade of the land. A bridge suggests a journey, even in a small suburban lot, creating a sense of transition and discovery. This approach enhances curb appeal by signaling a high level of intentionality in the design. It also addresses practical outdoor functionality goals, such as providing a stable crossing point during heavy rains while maintaining a cohesive aesthetic during the dry season.
Successful backyard bridge designs require a synthesis of structural engineering and horticultural artistry. When we plan these features, we consider the climate and the specific microclimates of the site. A dry creek bed, or Arroyo, must be engineered to handle peak flow volumes during spring thaws or summer storms, but it spends most of its life as a static visual element. The bridge acts as an anchor for the entire backyard composition. It provides the elevation necessary to create visual layers, breaking up the flat expanse of a lawn or a patio. By carefully selecting materials like Pressure-Treated Timber, Natural Stone Slabs, or Powder-Coated Steel, a consultant can harmonize the structure with the existing architecture of the home. This creates a seamless flow that makes the outdoor environment feel like a curated extension of the indoor living space.
Landscape Design Principles
Effective landscaping relies on the core principles of symmetry and focal points. When introducing a bridge, the structure serves as the primary visual interest. To prevent the bridge from looking isolated, we use visual balance through the placement of Boulders and Tiered Plantings. A bridge should never just sit on top of the grass; it needs to be integrated into the surrounding terrain. We often use Earthen Berms on either side of the bridge to increase the elevation change, making the dry creek bed feel deeper and more natural. This elevation layering allows for a richer vertical garden experience, where taller shrubs frame the bridge and low-growing groundcovers spill over the edges of the dry creek.
Irrigation planning is another critical component of the design phase. While the dry creek bed handles excess runoff, the plants surrounding the bridge require a dedicated Drip Irrigation System. Because the soil near a dry creek is often heavily amended with River Rock and Pea Gravel, it can drain faster than the surrounding lawn. We also prioritize the flow of walkways. A bridge should be the logical conclusion of a path made of Flagstone or Decomposed Granite. If the layout does not naturally lead the visitor to the bridge, the structure feels like an afterthought rather than a destination. By aligning the bridge with sightlines from the main windows of the house, we ensure the investment provides year-round visual value.
Plant and Material Selection
The following table outlines high-performance selections for the riparian zone surrounding a dry creek and bridge structure.
| Plant Type | Sun Exposure | Soil Needs | Water Demand | Growth Speed | Maintenance Level |
| :— | :— | :— | :— | :— | :— |
| River Birch | Full Sun to Part Shade | Moist, Acidic | High | Fast | Moderate |
| Blue Flag Iris | Full Sun | Wet, Boggy | High | Medium | Low |
| Creeping Jenny | Part Sun to Shade | Moist, Well-drained | Moderate | Fast | Moderate |
| Carex Sedge | Part Shade to Shade | Diverse, Moist | Moderate | Medium | Low |
| Switchgrass | Full Sun | Sandy to Clay | Low | Fast | Low |
| Red-Osier Dogwood| Full Sun to Part Shade | Moist to Wet | Moderate | Medium | Moderate |
For bridge materials, we recommend Western Red Cedar for its natural rot resistance and warm hue. For a more modern aesthetic, Composite Decking Boards offer longevity with minimal upkeep. When selecting stone for the creek bed beneath the bridge, a mix of 6 to 12-inch River Boulders and 1 to 3-inch Mexican Beach Pebbles creates a realistic, tiered look that mimics a natural stream.
Implementation Strategy
The implementation of backyard bridge designs begins with precise site grading. We first map the natural flow of water using a Transit Level or Laser Level to ensure the dry creek bed has a consistent 1% to 2% Slope. Once the path is excavated to a depth of roughly 8 to 12 inches, we install a Non-Woven Geotextile Fabric. This liner is essential for preventing weed growth from the soil below while allowing water to permeate. We edge the creek with Metal Landscape Edging or Large Anchor Stones to keep the surrounding mulch from washing into the stone channel.
Once the base of the creek is prepared, we focus on the bridge footings. A common mistake is resting the bridge directly on the soil. Instead, we use 4×4 Concrete Post Bases or Leveling Pads made of Crushed Limestone. This ensures the bridge remains stable and level as the ground settles over time. After the bridge is set, we backfill the edges with a 3-inch Layer of Hardwood Mulch. This mulch depth provides excellent moisture retention for the new plantings while giving the hardscaping a finished, professional look. Finally, we place the largest Feature Boulders at the entry and exit points of the bridge to “anchor” the structure into the landscape, making it appear as though the bridge was built around the environment.
Common Landscaping Failures
One of the most frequent failures in bridge and dry creek design is the “necklace effect.” This occurs when designers place stones of the same size in a single, monotonous line along the edge of the creek. To avoid this, we use various sizes of Riprap and River Rock to create a random, naturalistic appearance. Another critical error is poor drainage planning. If the dry creek bed ends abruptly without a proper French Drain or Dry Well at its terminus, the water will simply pool and cause soil saturation issues, potentially damaging the bridge footings or nearby foundations.
Root overcrowding is also a significant concern. While it is tempting to plant densely for immediate impact, many riparian species like Willows or certain Maples have aggressive root systems that can heave the bridge or disrupt the dry creek’s liner. We ensure a minimum of 3 to 5 feet of Spacing between the bridge structure and any large woody perennials. Furthermore, soil compaction during the construction phase can lead to irrigation inefficiencies. If the soil becomes too dense from heavy machinery, water will sit on the surface rather than reaching the root zones. We use a Broadfork or Mechanical Aerator to loosen the soil before any planting begins.
Seasonal Maintenance
Landscape management is a year-round commitment that changes with the seasons. In the spring, the focus is on debris removal. Winter storms often deposit leaves and twigs under the bridge and inside the dry creek bed. If left unattended, this organic matter decomposes and creates a layer of silt that encourages weed growth between the rocks. We also recommend an annual application of UV-Resistant Wood Sealant for timber bridges to prevent grey weathering and checking.
During the summer, the primary task is weed management and irrigation monitoring. Even with a liner, airborne seeds can take root in the silt between stones. A quick application of a Propane Torch or a directed Horticultural Vinegar can clear these without damaging the surrounding environment. In autumn, we suggest installing a temporary Fine Mesh Netting over the creek bed if the property has heavy deciduous cover. This makes leaf collection much easier. Finally, in winter, we inspect the bridge for any structural shifts caused by the freeze-thaw cycle. Checking the Galvanized Bolts and Decking Screws ensures the crossing remains safe for the following year.
Professional Landscaping FAQ
How deep should my dry creek bed be for a bridge?
Most residential dry creeks should be excavated to a depth of 8 to 14 inches. This allows for a 2-inch Layer of Sand, a geotextile liner, and several inches of stone while still providing enough clearance for the bridge structure above.
What is the best wood for a backyard bridge?
Western Red Cedar and Redwood are the industry standards due to their natural oils that resist decay and insects. For maximum lifespan, Pressure-Treated Southern Yellow Pine is affordable, while Ipe offers the highest durability for luxury installations.
Can I build a bridge over a dry creek without footings?
It is not recommended. Without Concrete Footings or a Compacted Gravel Base, the bridge will shift during heavy rains or soil expansion. This leads to an unlevel walking surface and potential structural failure of the handrails or joists.
How do I prevent weeds in my dry creek stones?
Using a high-quality Non-Woven Geotextile Fabric is the best defense. Avoid using plastic sheeting, as it traps water and causes runoff issues. Maintaining a clean stone bed by removing organic debris annually will prevent seeds from germinating in the creek.
How much weight can a standard decorative bridge hold?
Most pre-fabricated garden bridges are rated for 250 to 500 pounds. For custom-built structures, landscape architects design for a live load of 40 to 60 pounds per square foot, ensuring the bridge can safely hold multiple adults simultaneously.