
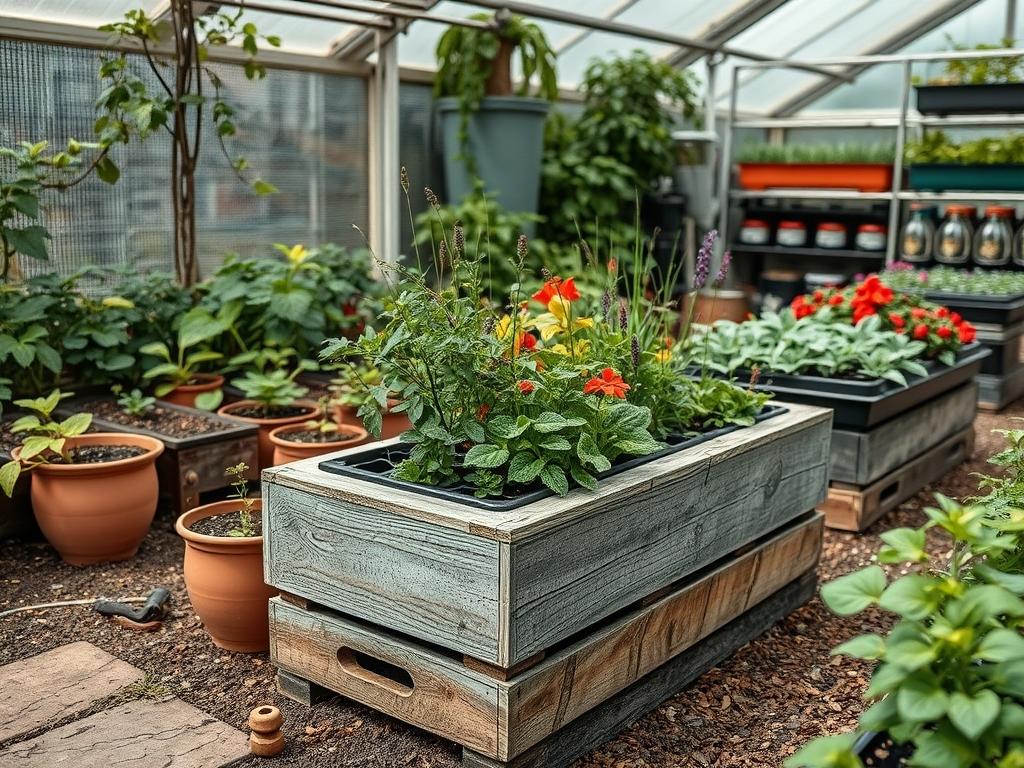
Window boxes represent a unique intersection between architectural design and horticultural practice. Unlike expansive backyard gardens, these containers act as miniature landscape ecosystems that must perform under high-visibility conditions throughout every season. Achieving professional grade Window Box Styling requires more than simply dropping plastic pots into a wooden frame; it necessitates a deep understanding of structural integrity, hydraulic conductivity, and microclimate variables. A well executed window box enhances curb appeal by softening the transition between hard building materials like Brick or Siding and the softscape elements of the lawn. From a consulting perspective, the objective is to create a three dimensional living arrangement that remains vibrant even when the surrounding ground level plants have gone dormant. This transition from vertical architecture to organic life provides a critical focal point for any residential exterior.
Landscape Design Principles
Successful window box arrangements follow the same core principles applied to large scale landscape master plans. Symmetry and visual balance serve as the foundation of the design. For a formal aesthetic, a symmetrical layout with a central Focal Point creates a sense of order and permanence. Conversely, an asymmetrical arrangement can feel more organic and modern, though it requires a careful hand to ensure the visual weight remains balanced across the length of the container.
Elevation layers are perhaps the most vital component of professional styling. In the industry, we often refer to this as the Thriller, Filler, and Spiller technique. The Thriller is a vertical element that provides height and architectural interest. It should be positioned centered or slightly off center toward the back of the box. The Filler consists of mid sized plants that occupy the bulk of the box volume, creating a dense and lush appearance. Finally, the Spiller includes trailing species that cascade over the front edge to soften the hard lines of the container.
Visual balance also involves considering the scale of the building. A tiny box on a large Stone facade will appear insignificant, while an oversized box can look cumbersome. As a rule of thumb, the box should be approximately 25 percent of the height of the window and should span the entire width of the sill. Integrating irrigation planning at this stage is also critical. For high end installations, we often hide 1/4 inch drip tubing behind the box or inside the wall cavity to ensure consistent hydration without the labor of manual watering.
Plant and Material Selection
Selecting the right biological components is a matter of matching the physiology of the plant to the specific environmental constraints of the window sill. North facing boxes require shade tolerant species, while south facing boxes demand high UV resistance.
| Plant Type | Sun Exposure | Soil Needs | Water Demand | Growth Speed | Maintenance Level |
| :— | :— | :— | :— | :— | :— |
| Dwarf Alberta Spruce | Full Sun to Part Shade | Well Drained | Moderate | Slow | Low |
| Geraniums | Full Sun | Organic Loam | Moderate | Medium | Moderate |
| Heuchera (Coral Bells) | Partial Shade | Humus Rich | Moderate | Medium | Low |
| Creeping Jenny | Full Sun to Shade | Moist Soil | High | Fast | Moderate |
| Pansies | Full Sun to Part Shade | Standard Potting | Moderate | Medium | Low |
| English Ivy | Shade | Versatile | Low | Fast | High (Pruning) |
| Petunias | Full Sun | Nutrient Dense | High | Fast | High (Deadheading) |
Implementation Strategy
The implementation process begins with the physical installation of the housing. Whether you choose Cedar, Fiberglass, or Wrought Iron with Coco Liners, the structural mounting must be secure. Use 3-inch galvanized lag bolts to attach brackets directly into the house framing or masonry to support the significant weight of wet soil.
Once the box is mounted, the internal layering begins. Start with a thin layer of Landscape fabric at the bottom to prevent soil migration through the Drainage holes. Avoid using heavy gravel at the bottom; it takes up root space and decreases the overall volume of the growing medium. Instead, fill the box with a high quality, lightweight Potting mix amended with Perlite and Vermiculite for aeration.
When placing plants, start with the Thriller species. Dig a hole twice the size of the Root ball and gently loosen the roots before placing it. Follow with the Fillers, maintaining a spacing of 4 to 6 inches depending on the species to allow for growth without immediate overcrowding. The Spillers should be tilted slightly toward the front of the box to encourage downward growth. After the plants are set, add a 1-inch layer of decorative mulch or Sphagnum moss. This layer serves two purposes: it retains moisture by reducing evaporation and it prevents soil from splashing onto the window during heavy rain. Finally, saturate the box thoroughly until water flows freely from the bottom, ensuring there are no air pockets around the roots.
Common Landscaping Failures
The most frequent failure in window box management is poor drainage. If a container lacks sufficient Drainage holes, or if those holes become clogged with sediment, the roots will sit in stagnant water. This leads to Root rot, a fungal condition that can kill an entire arrangement in days. Always ensure there is at least one 1/2 inch hole for every 12 inches of box length.
Soil compaction is another silent killer. Over time, the organic matter in Potting soil breaks down, and the mix becomes dense and anaerobic. This prevents oxygen from reaching the roots and restricts water flow. Professional installers typically refresh at least 50 percent of the soil every year to maintain the proper pore space.
Overcrowding is often driven by a desire for instant results. Homeowners often pack too many 4 inch starters into a single box. Within a month, the plants compete for limited nutrients and water, leading to stunted growth and legalistic appearances. Always respect the mature spread of the species. Similarly, improper irrigation is a common issue. Because window boxes are elevated and exposed to wind on all sides, they dry out significantly faster than garden beds. If the soil is allowed to pull away from the sides of the box, water will simply run down the gap and out the bottom without ever reaching the roots.
Seasonal Maintenance
To maintain year round color, your maintenance schedule must adapt to the physiological needs of the plants throughout the changing seasons.
In the Spring, the focus is on growth and revitalization. Replace any winter damaged evergreens and introduce cool weather species like Snapdragons or Dusty Miller. Apply a Slow-release granulated fertilizer (such as a 10-10-10 NPK ratio) to provide a steady supply of nutrients for the coming months.
Summer maintenance is dominated by water management and deadheading. High temperatures may require watering twice daily. Regularly remove spent blooms from Petunias and Geraniums to stimulate the production of new flowers. During heat waves, a liquid Seaweed extract can help plants cope with thermal stress.
Autumn brings a palette shift. Swap tired summer annuals for Chrysanthemums, Ornamental Peppers, or Flowering Kale. These species handle the dropping temperatures well and provide deep, rich textures. This is also the time to check the structural integrity of the brackets before the weight of winter snow adds additional stress to the mounts.
Winter presents the greatest challenge. In colder climates, most herbaceous plants will perish. The strategy here shifts to structural styling. Use Dwarf Conifers, Boxwood clippings, and Red Twig Dogwood branches to create a winter interest display. If the box is planted with hardy perennials, wrap the interior with Bubble wrap or Insulation liners before adding soil in the spring to protect the roots from the freeze thaw cycle.
Professional Landscaping FAQ
How often should I fertilize my window boxes?
Because window boxes have limited soil volume, nutrients leach out quickly during watering. Apply a Water soluble fertilizer every two weeks during the active growing season. Supplement this with a Balanced slow release granule in the spring and mid summer.
What is the best material for a long lasting window box?
Cellular PVC and Fiberglass are the most durable options because they do not rot, crack, or warp. If you prefer the look of wood, choose Rot resistant Cedar or Teak and use a Plastic liner to prevent soil contact.
Can I use garden soil in my window boxes?
Never use standard garden soil. It is too heavy for elevated boxes and lacks the necessary porosity. Garden soil also contains weed seeds and pathogens. Always use a professional grade Soilless potting mix containing Peat moss and Perlite.
How do I prevent water from staining my house siding?
Ensure your window box is mounted with a 1 inch gap between the box and the siding. This allows for airflow and prevents moisture trapped behind the box. Use Drip trays or integrated drainage channels to direct excess water away.
What are the best low maintenance plants for window boxes?
For minimal upkeep, choose Succulents like Sedum or hardy Evergreens. Heuchera is an excellent choice as it provides year round foliage color with very little pruning. Pair these with Automated drip irrigation to virtually eliminate daily maintenance tasks.